Splatoon Turf War Guide: Top Weapon Styles & Whirlpool Islands Cafeteria Guide
If you've always considered the Splatoon series a pure PvP shooter, this *Splatoon: Turf Strike Team* will totally change your perception -- this time, they won't force you to fight other players for turf every match. Instead, it's a single-player loot-RPG experience: you control the new protagonist "The Mechanic", team up with the Salmon Run Gang (Sasa, Manman, and Ghost Fu), get stranded on the mysterious Whirlpool Archipelago, fight all kinds of Salmonids, explore dungeons for treasures, and craft stronger builds from the weapons, attachments, and secret treasures you pick up!
My absolute favorite part is the late-game loot grind -- weapons aren't just fixed in stats anymore. The same gun type can have wildly different performance depending on its star rank, weapon abilities, and "Exquisite" effects, and you can modify and upgrade attachments by adding parts. Once you reach the "Infinite Diner" area, *Splatoon: Turf Strike Team* even feels like a loot RPG with a Splatoon paint coating! Below, I'll walk you through everything from early-game start to the hidden boss on floor 100, plus late-game farming tips.
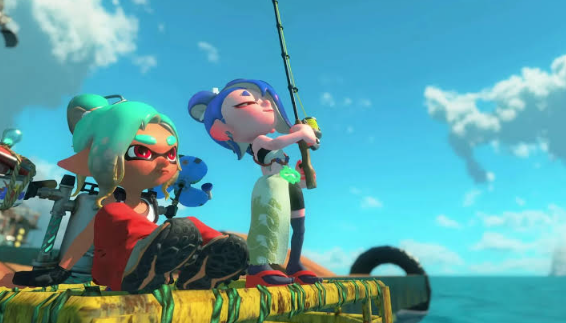
I. Basic Info & Release Details for Splatoon: Turf Strike Team
1. Release Date & Platform Exclusivity
Splatoon: Turf Strike Team officially launched on July 23, 2026! This game is exclusive to Nintendo Switch 2 -- you can't run it on the original Switch at all. The story is set on the mysterious "Whirlpool Archipelago", where the Mechanic and the Salmon Run Gang members crash-land. You'll need to find your way home by hunting treasures, researching Salmonids, and repairing equipment.
2. Price & Availability in Taiwan/Hong Kong
The Taiwanese digital version of the game is priced at NT$1,480, while the physical edition is NT$1,680. The Hong Kong digital version is HK$379, and the physical version is HK$429. It's available at all retailers now -- you can grab it from the Nintendo eShop directly, or pick up physical copies at major game retailers in Taiwan and Hong Kong.
3. Traditional Chinese Support & Modes
This game has full Traditional Chinese support! The main story is a single-player adventure, and it also supports 2-4 players for local and online co-op. Online play requires a Nintendo Switch Online membership. The multiplayer mode automatically adjusts player power so high-level players won't instantly one-shot lower-level stages, so new players can still enjoy co-op fun ~
II. Full Weapon System Breakdown & Investment Priorities
1. Full Weapon Types & Exquisite Weapon Recommendations
This game has over 100 weapon variants, including shooters, rollers, snipers, bomb launchers, brushes, buckets, rotating guns, dual guns, umbrellas, fish-hunting bows, and windshield wipers. The most worth farming in the late game are ★4 and ★5 "Exquisite Weapons"! Exquisite weapons aren't just higher-starred -- they come with special abilities, and pairing them with the right perks makes a huge difference in damage and power. For the early game, I recommend shooters and rotating guns -- they have great range and high forgivness. Once you hit high difficulties, bomb launchers, dual guns, and wipers are way easier to make extremely high-DPS builds with!
2. Weapon Investment Priorities & Fragment Management
Do NOT distribute Whirlpool Fragments evenly across all weapons early on! My priority order is: Main Weapons > Main Backpack/Tank > High-Use Attachments > Other Collection Weapons. Because gear drop levels are tied to your character and dungeon levels, if you level up low-rank weapons too early, you'll replace them after a few stages -- that's a total waste of resources!
3. Weapon Upgrade & Decomposition/Recycling Tips
Low-star, low-level, or underperforming weapons can be decomposed to get materials for gear you actually use. After beating the game, you'll unlock more flexible weapon ability adjustment features, so you don't need to rush for "three perfect perks" in the early game. The only weapons worth keeping long-term are high-star Exquisite Weapons, plus ★5 weapons with perks that fit your build perfectly.
III. Backpack Build Deep Dive: Speed, Power, Tech Types
1. Differences Between the Three Backpack Types & Skill Tree Gameplay
The three "backpack build types" players talk about are basically three Tank and attachment systems: Speed, Power, and Tech. Speed focuses on movement, dashes, grappling hooks, and fast engagement. Power emphasizes explosions, wide-area strikes, and close-quarters raw damage. Tech is all about auto-turrets, lasers, floating control, and cooldown cycles, perfect for players who like to play smart.
2. Three Build Types' Gear Recommendations
For Speed builds, I recommend pairing them with Runner Boots, Sticky Bombs, Jump Bombs, and Ninja Grappling Hooks for map running and speed.
The thrill of grinding is so satisfying! For Power-type builds, stick to Paint Satellite, Meteor Glove, and Vortex Blaster to make an explosive set—your damage will hit max levels instantly! For Tactical-type, use auto-attack gear like Support Flask, Tractor Laser, and Whirlwind Spin; it turns the screen into a near-autofire zone where you barely have to aim, it’s awesome~
3. Gear Builds & Cooldown/Damage Optimization
Don’t just chase raw damage for parts! Stats like cooldown reduction, extra charges, auto-activation, weapon upgrades, and explosion range are way more important than flat damage bonuses~
A 10% damage boost is actually way more practical, especially in late-game stages where tons of Salmonids spawn all at once. The value of 'sustained damage' is way bigger than 'one-hit kill' power here~
IV. Complete Guide to the Grizzco Crew & Specials System
A. Special Evaluations & Recommendations for Sha Sha, Man Man, & Gui Fu These three characters have totally distinct special designs, each shining in specific scenarios: Sha Sha’s 'Teacher Rush' is a shark-guided charge, perfect for big targets or squeezing through tight spaces; Man Man’s 'Heavy Rain Eel' is a mass clear-all, covering an entire zone the second you deploy it; Gui Fu’s 'Stingray Whirl' is all about mobility—you ride a Stingray to splat ink mid-air, and both clearing speed and movement feel super smooth. If I ranked priority: new players should pick Man Man for story runs, Boss fights go to Sha Sha, and for large-scale team battles or exploration, Gui Fu’s special will give you a totally different gameplay experience~
B. Special Gauge Accumulation & Bond System Collecting Salmon eggs during combat boosts the Grizzco Crew’s mood, and you can unleash your special when the gauge is full. Don’t waste it the second it’s filled—save it for when big waves of Salmonids spawn or a major enemy shows up, that’s way more efficient. As the bond level between characters rises, their support functions during surveys and combat get way more complete. So don’t stick to just one character all the time; trying different combos will give you cool surprises~
C. Mech Special Support Functions & Partner Unlocks The survey mech isn’t just for fighting—it can also scan for hidden treasures, provide cover fire, act as a platform, drill for crystals, even tunnel underground to move around. When you spot a high obvious platform or hard crystal while exploring, call the mech first instead of wasting time looping the map aimlessly~
V. Tidal Archipelago Map Exploration & Dungeon Guide
A. Overview of All 25 Islands & 61 Dungeons The Tidal Archipelago has 25 main islands total, starting from the initial beach and extending to volcanoes, icebergs, lakes, caves, and the big cafeteria area. If you count tutorial stages, treasure quests, nests, underground ruins, Boss levels, and post-clear hidden content, there are 61 main dungeon nodes we’ve sorted out. The late-game area for grinding gear is the final hidden ruins, Infinite Cafeteria, and Infinite Cafeteria Gold Zone~
B. Dungeon Types, Hidden Treasures, & Shortcut Spots Dungeons aren’t just regular monster runs—some stages need a grappling hook, bomb jumps, the survey mech, or ink movement to find shortcuts. Wooden crates, tall towers, balloons, and weirdly high platforms are all worth checking; many adventure logs and secrets hide in spots that are 'visible on the normal path but unreachable'—don’t miss them~
C. Island Unlock Order & Efficient Exploration Route On your first playthrough, don’t rush to 100% every area. Push the main story first to unlock new gear. Once you get Ninja Grappling Hook, Jump Bombs, Rush Bombs, etc., come back and clear the map slowly—this is way more efficient than forcing yourself to climb high stuff at the start~
VI. Salmonid Enemy Bestiary & Boss Fight Tips
A. Salmonid Types, Weaknesses, & Attribute Counters The Salmonids here have more RPG-style depth than Splatoon 3’s Salmon Run. Besides regular Salmonids, there are Steelheads, Bomb Throwers, Towers, Fuzzy Oozes, Stingers, and even upgraded variants. The 'counter' system here leans into weapon range, status effects, and gear mechanics: melee-focused enemies are easiest with area explosions, while high-threat long-range targets should be sniped or approached with a grappling hook first~
B. Countermeasures for Tower, Steel Ball, & Giant Salmonids Tower-type enemies must be dealt with immediately—leave them alone and they’ll harass you from far nonstop. For Steel Balls, watch their landing points and don’t stay in the same spot taking damage. Giant Salmonids usually have high HP but clear movements; using freeze, burn, or large-area explosion skills will make killing them way faster~
C. Boss Fight Damage Advice & Rare Drops When fighting Bosses, don’t blow all your gear at once. Start with stable damage from your weapon, wait for B...
When the boss enters a big stagger state or gets close to you, activate Weapon Buff, Freeze, and Ultimate Skill at the same time—pour all that out for massive damage! High-difficulty Bosses and special Salmonids are also key sources for getting Level 5 weapons, parts, and high-tier materials~
VII. Gear-Farming, Build, and Vortex Shard Management Guide
A. Efficient Farming Routes & Shard Acquisition When you’re in the mid-game and need to farm weapons, I highly recommend Annan’s Nest. Once your build is set, you can even finish a full run in super short time. If you haven’t unlocked it yet, stick to underground ruins around your level, or 3 levels higher—you’ll get weapons, EXP, and parts all at once. Once you clear the main story, the most efficient spot by far is the Infinite Dining Hall; high-star and exclusive drops are super concentrated there~
B. Vortex Shard Investment: Prioritize Your Best Weapon & Exclusive Upgrades Use Vortex Shards to first power up a weapon you actually love using, then upgrade your main Tank’s gear. Don’t go crazy upgrading every Level 5 weapon you see—if it’s high-star but you hate the weapon type, it’ll just sit in your storage as a decoration~
C. Avoid Wasting Shards & End-Game Optimization After you get the Treasure Title, Vortex Shard acquisition rate will increase slowly, so save big shard farming for mid to late game. Instead of spending 2 hours farming shards early on, push the story to unlock higher-content first—you’ll farm way more efficiently later~
VIII. Vehicle System & Mech Operations Full Guide
A. Recommended Vehicle Types: Unlock & Upgrade Guide The three Tank types—Speed, Power, and Tactical—are core to your build too. Speed ones are great for exploration and fast runs; Power types work for Boss fights and close-quarters burst damage; Tactical ones focus on automatic combat, perfect for AFK resource farming~
Tips for dealing damage and clearing the battlefield safely.
B. Survey Mech Operations & Ultimate Assistant Guide
This Survey Mech is super versatile! It can shoot, drill for treasure, and even carry you to hard-to-reach high places~ You don’t have to watch it nonstop during fights—it auto-assists in attacking enemies. Just summon it when you need to cross tricky terrain or find hidden treasures, and you’ll be way more efficient.
C. Vehicle Switching & Driving Optimization Tips
Make sure to level up all three Tank types in the late game! Unlocking hidden ruins and the Infinite Dining Hall both require clear records of different Tank types. Early on, you can focus on Speed types, but before beating the main story, make sure at least the basic abilities of the other two Tanks are filled—so you won’t get stuck later.
IX. Difficulty Settings & Post-Game Hidden Content Guide
A. Normal, Spicy, and Extra Spicy Difficulty Differences You can adjust the game’s combat difficulty freely—pick from the easiest "Sightseer", practice-friendly "Inkling", and hardcore "Survival Expert"—plus dungeons have three challenge levels: Normal, Spicy, Extra Spicy, super flexible! Enemies on higher difficulties hit harder and take more hits, but they won’t block basic treasure drops. New players don’t need to push hard on difficulty early to get loot—you can progress smoothly by playing casually.
B. Unlocking Hidden Ruins & Infinite Dining Hall After Clear After beating the main story, the fog on the map’s edges will lift, and 3 hidden ruins will unlock. Clear each of these 3 ruins once with a Speed, Power, and Tactical Tank respectively, and you’ll officially unlock the Infinite Dining Hall.
C. Regular High-Difficulty Content Choices & Rewards Extra Spicy difficulty is the best spot for farming Level 5 items and exclusive weapons! If your weapon build isn’t ready yet, don’t rush to tackle Extra Spicy—farm gear on Spicy or lower floors first, you’ll be way more efficient.
X. Hidden Boss Guide & 100% Damage Reduction Build
A. Hidden Boss Strategy & No-Brainer Explosion Build Once you reach Floor 100 of the Infinite Dining Hall, you can challenge the Hidden Boss! This Boss’ mechanics aren’t too tricky, but the annoying part is its large attack range, high damage, and sudden huge attack density in the second half—you’ll need good movement skills.
If you want an easier time, go with the Explosion Build: use Jump Bombs, Meteor Gloves, or cooling-down-reducing accessories to keep exploding the field—you just focus on moving and dodging, it’s way simpler.
B. 16% Specific Weapon Drop Rate Tips
You’ll often see "16% specific weapon drop rate" online, but late-game gear stats and drop effects change based on your build and patch values—don’t treat this 16% as a fixed formula. The real effective way is to go to the Infinite Dining Hall (high drop rate area) and pair it with weapon-type related abilities, narrow down your gear target, and you’ll have a higher chance of getting the weapon you want.
C. 100% Damage Reduction Build & Run Optimization
The so-called "100% Damage Reduction Build" is just a player nickname, not actually permanent invincibility, okay? For example, the "Quick Slash Attacker" on a Strength-type Tank—high-tier damage reduction parts can hit up to ~90% reduction alone. Pair that with HP regen, Ink Recovery, and other defensive effects, and in actual matches it's super tanky, with barely any damage coming off, it looks insane.
That said, you can still get one-shot by special attacks on higher floors, so don't think "my health bar doesn't move" means you don't have to dodge at all—pay attention to positioning!
XI. 20 Must-Know Tips for New Players
A. Early Game Vehicle Selection & Loadout Build Recommendations
1. New players, go for Speed-type first. The movement and exploration are way more comfortable.
2. Start with a Shooter as your first weapon. Way more forgiving than forcing Sniper right away.
3. Don't swap weapons just for star ratings. The stats and how it feels to play matter more.
4. Save your Tidal Shards for your main weapon. Don't spread them thin leveling 10 different guns.
5. Use Treasure Radar a lot when scouting for mechs. It makes a huge difference in map clear speed.
6. Make Sprint Bombs and Jump Bombs early. They're essential for speed runs later.
7. Ninja Steel Rope is worth prioritizing. Works for mapping, escaping, and clearing stages.
B. Pitfall Avoidance & Wasting Shards
8. Don't fully level low-star transition weapons.
9. Don't use all your high-tier parts on niche builds.
10. Don't grind for Exclusives early on. Way more efficient after you beat the main story.
11. Kill Tower Salmonids as soon as you see them.
12. Don't use your Special when only 2-3 small fish are left.
13. Don't only level one type of Tank. You'll need all three later for Infinite Diner.
14. Don't pick Relics just for attack power. Cooldown reduction and direct damage boosts are usually better.
C. First Week Must-Dos & Progression Planning
15. Beat the main story first in your first week.
16. Whenever you hit a new map, unlock the Fast Travel points and core mechanisms first.
17. Grab Adventure Logs as soon as you see them. If you want 100% collection later, getting them now saves you a lot of trouble.
18. Bring the three Salmon Run partners with you on rotation. Raise Bond Levels with different partners early.
19. Once you unlock the Anemone Nest, make your first speed-run build right away.
20. Before Infinite Diner opens, don't rush for perfect gear. You'll get so much true endgame gear later you'll be overwhelmed.
XII. Weapon Tier List Analysis & Recommendations
A. Sniper, Melee, & Ranged Weapon Tiers
Judging by late-game practicality right now, I'd put high-tier Blasters, Rollers, Dualies, and some Splatlings in S-Tier. Shootings are A+ because their biggest strength is super consistent performance. Snipers hit insane damage, but if you get swarmed by Salmonids up close, the skill ceiling jumps way higher fast.
Stuff like the Toy Blaster line, LN2 Roller, Ore Disc Roller, and high-tier Dualies are super popular and heavily discussed by late-game players right now.
B. What's the Difference Between Exclusives and Regular Weapons
Exclusives only show up in high-star equipment, and they come with more special weapon effects. Honestly, regular ★5 gear is more than enough to beat the main story. Exclusives' real value shines when you're taking on high-floor Infinite Diner and building min-maxed loadouts.
C. Weapon Recommendations & Specialization by Stage/Scenario
For speedrunning stages, go for high-mobility, high-area weapons first. For boss fights, lock in high single-target damage types. On higher floors, you'll want weapons with freeze, burn, or survival perks to stay alive. No weapon is perfect for every single scenario, after all.
XIII. Exclusive Traditional Chinese Guides & Insights from Taiwan and Hong Kong Players
A. Evaluations from Taiwan & Hong Kong Players + Game Recommendations
Taiwan and Hong Kong players' thoughts on *Splatoon Inkstriker* are pretty polarized, but in a fun, unexpected way. Folks who love the Splatoon universe mostly adore not having to grind PvP matches every single day. And for those who live for loot-hunting? They’ve fully fallen down the Infinite Dining Hall rabbit hole and can’t get out.
B. Differences Between Traditional Chinese Versions & Localization Support
Both the Taiwan and Hong Kong versions fully support Traditional Chinese, and the game’s official title is *Splatoon Inkstriker*. Japanese guides often refer to this game using the term "Reiders" (レイダース). If you find there’s not enough Traditional Chinese info when searching for gear, try cross-referencing with weapon designs or its Japanese name—you’ll have an easier time finding what you need.
C. Recommended Traditional Chinese Guides & Community Resources
Right now, the most popular and useful resources for Traditional Chinese players are Bahamut, Nintendo’s official community, and gameplay videos uploaded by Taiwanese and Hong Kong players. Info on top-tier "Exquisite Weapons" and late-game builds updates super fast—guides from the game’s first week are probably already outdated.
XIV. Loot-RPG Progression Systems & Core Late-Game Content
A. Weapon Mods, Relics & Encyclopedia Completion
There’s a ton of stuff to farm in the late game: over 120 types of weapons, parts, relics, adventure logs, compasses, clothing, plus Fish Gang bond levels and your Tank’s level. Collecting certain relics boosts your title, and eventually doubles your Swirl Shard gain rate.
B. Optimization Tips for Repeating Late-Game Loot Runs
If you want to cut down the time per run, the key isn’t just stacking DPS—it’s building a mobile-focused build. Shorter cooldowns on Sprint Bombs, Jump Bombs, and Ninja Grappling Hooks mean you don’t have to stick to the normal path through most levels to speed through them.
C. Player Challenge Record for Infinite Dining Hall Floor 970
The Infinite Dining Hall has a hidden boss at Floor 100, but beating it doesn’t mean the end—you can keep climbing floors. Some players in the community have grinded to hundreds of floors and beyond, but "Floor 970" isn’t a hard cap. It’s just a self-imposed challenge for those chasing limits. Honestly, you don’t need to go that high to farm resources. For example, Floor 97 is perfect for farming Swirl Crystals because of the high density of special Salmonids. Going all the way to 970 is just for bragging rights, not required to beat the game or complete it.
XV. Final Game Review & Purchase Advice
A. Overall Review: Pros & Cons
The biggest plus for *Splatoon Inkstriker* is that it didn’t just port Splatoon 3’s PvP as a spin-off—it was actually redesigned into a loot-hunting exploration game. Random weapon abilities, Tank builds, mod parts, relics, and the Infinite Dining Hall give this game way more build flexibility and replayability than the main series’ single-player mode. The downside? The late-game farming grind is intense. If you want that specific ★5 Exquisite gear, perfect weapon abilities, or high-rarity parts, get ready to repeat the same dungeon over and over.
B. Who Should Play It + New Player Tips
If you love Splatoon’s controls but can’t stand PvP’s competitive pressure? This game was made for you. If you love Diablo-style loot-hunting fun—where “just one more run might get me a legendary” gets you hooked? You’ll get addicted to this too. On the flip side, if all you want is ranked PvP matches? *Splatoon Inkstriker* isn’t Splatoon 4—its core is all PvE loot-hunting adventure.
C. Post-Launch Purchasing: Where to Buy & Version Options
Right now, the digital download version in Taiwan is TWD 1480, while the physical copy is TWD 1680. In Hong Kong, they cost HKD 379 and HKD 429 respectively. Both versions have the exact same content. If you just want to jump in and play fast, go for the digital download. If you love collecting physical Splatoon boxes or might resell the game later? The physical version is worth the extra cash. The biggest thing players underestimate about *Splatoon Inkstriker* is that it looks like a “Fish Gang-modified Hero Mode” at first glance—but once you beat it, you realize it’s nothing like that. For your first 20-30 hours, you’ll explore Swirl Islands, unlock new parts, and tackle Salmonid events. Then the game shifts to its main focus: grinding to ★5 gear, hunting top-tier “Exquisite” parts, tuning weapon mods, hoarding rare relics, and diving into the Infinite Dining Hall’s loot trap. If you’re a new player just starting out
We highly suggest starting with the Tank class first—pick a comfortable shooting gun to breeze through the main story, and pour all your Vortex Shards into your main gear. There’s no need to go chasing absolute top-tier gear right off the bat. After beating the campaign, make sure to clear the 3 hidden ruins using three different Tank classes each—this will unlock the Infinite Mess Hall feature, which is when you can really dive into crafting your own ideal endgame build.
Once you get good enough to speed-run a level in just 30 seconds using the Ninja Rope paired with bombs, and you’re surrounded by stacks of ★5-tier gear wondering which weapon with great stats to pick—you’ll finally get why Splatoon Splat Force is so addictive. It’s not about who covers more ink turf; it’s that you’ll always catch yourself thinking, “Just one more run! The next drop could be that legendary top-tier gear!”