Piu Piu Slime Must-See Guide: New Player Builds, Gear, Skills, Companions, Progression, Events & Res
This game is way more complex than it looks at first glance! While the slime attacks automatically, you still need to control its movement to dodge enemy projectiles and time your active skills perfectly. For tough levels, you even have to adjust your gear and party to counter the boss's mechanics.
Currently developed by Taiwanese game studio X-Legend, this game blends bullet hell shooting, devour-based evolution, offline AFK grinding, gear affixes, skill combinations, and companion nurturing into its core loop. You play as a wizard who turned into a slime after a failed alchemy experiment—by devouring various energies, evolving battle forms, and recruiting companions, you’ll grow from a weak monster to conquer the evil empire’s core. The official store page is currently running a collaboration version with *Foolish Cat*, and they’ve had collabs with *Gapoo the Caterpillar* in the past. For things like resource allocation, gear affixes, skill pulls, companion bonds, base dungeons, event stockpiling, gacha spending, and how to handle late-game roadblocks, this guide won’t just tell you “what’s best”—it’ll explain why to pick that option and when to switch up your growth path.
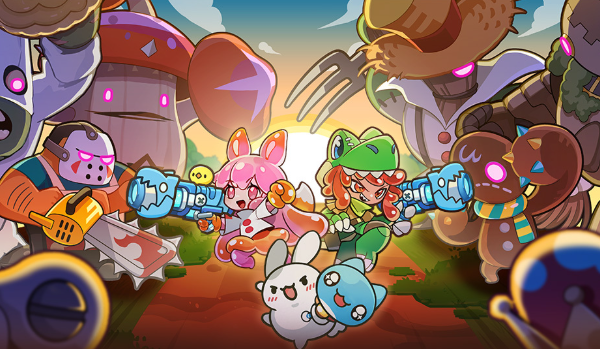
I. Slime Dash Beginner’s Full Guide
A. Core Gameplay Overview: Bullet Hell × Idle Evolution
Combat in Slime Dash can be summed up as “auto-attacks, manual movement.” Your slime will keep shooting enemies based on its equipped weapons and skills, while you control its movement to dodge enemy bullets and trigger active skills at the right moment.
Early on, you can breeze through normal levels by just brute-forcing with stats, but chapter bosses, event leaders, and high-difficulty dungeons will hit roadblocks hard if you rely solely on auto-play. In these cases, smart movement matters more than stacking extra defense—dodging the boss’s big attack will let you keep dealing damage, so you can beat tricky levels with lower stats.
Another core mechanic is Devour Evolution—you’ll unlock different build paths over time, like skill-based, shooter-focused, or companion-centric, then max out one path using gear, affixes, skills, genes, and companion buffs. The dev team also added elemental evolutions like Fire, Frost, and Lightning, plus dozens of battle forms as key features. Here are the best parts of Slime Dash:
What makes this game stand out is that it caters to two types of players at the same time.
For busy players who can’t stare at their phones all day, the offline AFK system lets you steadily earn gold, XP, skills, and growth materials. For those who like active play, you can push limits in levels, boss fights, and PvP by mastering movement. So it’s not a mindless idle game, and it won’t force you to play for hours every day.
There are lots of growth systems, but they’re not isolated: your account level boosts base gear stats, Jelly level affects your chance to pull high-tier gear and skills, and gear affixes amplify your skill, shooter, or companion build. If you pick the right path early on, you’ll grow really fast. But if you spread resources across all systems equally, you might end up with decent stats but bad damage when pushing levels.
The game is available on both mobile apps and PC web versions, and the Google Play page says it works on Android and Windows—super convenient for players who want to AFK for long periods. Next up: login rewards, event rewards, and promo code redemption info:
When you start a new account, don’t rush to pull gacha. First, claim mailbox rewards, login bonuses, server launch quests, event check-ins, and code rewards. Once you know how many skill tickets, companion tickets, Red Gems, and Jellies you have, you can decide how to allocate your resources.
The redemption entrance might change a bit per version, but the common way for players now is to click the top-left avatar, go to your profile page, then look for the “Redemption Code” or “Serial Code” function at the bottom left. Watch for capitalization when typing, and double-check for extra spaces after copying. Here’s the official universal code:
PPSTYKR9R
The official page says this code expires on December 31, 2026. The actual code details, eligible accounts, and rewards will be shown in-game. Some codes from magazines, shopping sites, or collab events are one-time use, so don’t use personal codes as universal ones. Next up: build recommendations and class choices:
A. Analysis of the 3 Main Builds: Skill Mutator, Shooter Mimic, Companion Symbiont
The easiest builds for new players are three main ones: Skill Mutator, Shooter Mimic, and Companion Symbiont.
Skill Mutator relies on active skills for burst damage, f
Its key stats are Skill Damage, Skill Crit Chance, Cooldown Reduction, and Elemental Damage Bonus. The upside is that it doesn’t require high-tier gear early on—just level up your skills, and you’ll notice big improvements in clearing mobs and taking down bosses.
The Shooting Mimicry build relies mostly on basic attacks, with key stats being Basic Attack Damage, Basic Attack Crit Chance, Attack Speed, and matching elemental damage. Once your gear is fully optimized
The Shooting build has a very consistent damage curve—there’s almost no downtime from skill cooldowns. However, when you first start the game, if your Attack Speed and Crit Chance are low, the gameplay feel is definitely weaker than the Skill Build.
As for the Companion Synergy Build, its core damage comes almost entirely from summoned companions. You stack power through their damage, Attack Speed, summon effects, plus Bond Bonuses and star-up upgrades. This build is perfect for AFK resource farming, but it needs a full companion pool and high star-leveled companions early on—new players should not rush to switch to this build when the server just launches. Local Taiwanese game guide communities also generally recommend unlocking enough companions first before considering this as your main playstyle.
So why is the Skill Build the most stable choice for starting out? In fact, recommending the Skill Build for new players at launch doesn’t mean it’s always the strongest—it’s just the easiest to get started with, with the lowest entry barrier.
When you first start, most players don’t have Attack Speed gear yet, their Basic Attack Crit Chance is low, and they only have a few low-star companions. This is where the Skill Build shines: its skill damage has a relatively stable base multiplier. Focus on leveling up 1-2 area-of-effect (AoE) skills, and you’ll be able to clear swarms of mobs super fast, making quest progression way quicker.
My tip for new players is to prioritize getting two skills early on: one for clearing mobs in AoE, and one for single-target burst damage. Use the AoE skill for regular stages, swap it out for a high-damage single-target skill when facing a boss, and pair it with Cooldown Reduction passives—this will give you enough damage to clear content.
A lot of players, when they hit around Account Level 100, will switch to either the Shooting Build or the Elemental Damage Build based on their gear and Soul Gems. This isn’t a hard rule, just a check-in point: once your Attack Speed, Crit Chance, and Basic Attack stats are all in place, the Shooting Build’s damage will finally catch up to (or even exceed) the burst damage of the early Skill Build.
Comparison & Use Cases
The Skill Build has a wide range of use cases: great for regular stages, short boss fights, or events where you need to clear mobs quickly. But its downsides are clear: there’s noticeable downtime in damage when your main skill is on cooldown, and it’s heavily dependent on skill levels—if your main skills are low level, your damage will be hard to push.
The Shooting Build is better for longer fights, single-target bosses, or content that needs consistent, steady damage. Once you stack enough Attack Speed and Crit Chance, your output will be super smooth with almost no downtime. But it has high requirements for gear stats, so it’s tough to build early on.
The biggest upside of the Companion Build is that it’s great for AFK play, stages with multiple targets, or players who don’t want to manually spam skills nonstop. But its downsides are obvious: there’s too much to upgrade. Beyond your own gear, you have to manage recruiting companions, leveling their stars, Bonds, and their exclusive bonuses—making it a bit of a hassle to build.
New players don’t have to stick with one build forever—this game has a gear set switching feature. You can totally use the Skill Build to get through early game smoothly, then keep gear that boosts Attack Speed, Basic Attack Crit Chance, or Companion Damage, and switch builds when the time is right.
III. Resource Management & Upgrade Priorities
A. Core Resource Breakdown: Jellies, Account Level, Red Diamonds
The Jelly System is an important mechanism that new players often overlook—don’t sleep on it! You use Jellies to pull for skills and gear, and any duplicates you get can be converted into Gold or EXP, so nothing goes to waste. Also, the higher your Jelly level, the better your chances of getting high-quality gear and rare skills. So Jellies aren’t just a pull menu—they directly impact your growth speed later on. Don’t take them lightly.
Account Level also limits gear’s base stats. For the same orange gear, if you get it when your account is higher level, its Attack and other base stats will be way better than if you got it at a lower level. So don’t rush to upgrade every orange gear you get early on—most are just for transition, so don’t waste too many resources on them.
Red Diamonds are super versatile core resources here—use them for gears, skill coupons, shop items, and even recruitment events. For free-to-play or small-spend players, the biggest no-no is splurging the second you see that red notification. Later, there’ll always be mounts, overpowered skills, or event rushes that need tons of Red Diamonds—don’t waste them willy-nilly.
B. Resource Allocation Strategy: How to Spend Smartly Early On
Early game isn’t about maxing every system—it’s about pushing the main story first. The higher you climb in the main chapters, the better gold, EXP, and skill drops you’ll get from AFK farming. So, resources that clear stages take top priority—don’t blow them on random stuff.
For gold, pour into upgrading the Jelly System and your main Skill Build skills. Use EXP to level up your account. Hold on to some Red Diamonds, then buy gears or core skill coupons based on your needs. If shop prices jack up, skip nonstop refreshing for tiny short-term power gains—it’s not worth wasting Red Diamonds.
Some guides say stockpile Jelly when it’s almost Rank 18, save it for higher-tier events or rush events. Rank 20 unlocks better equipment too. But event timings vary per server—safest bet is to check event previews first before pausing Jelly usage.
To max AFK gains, here’s my daily routine after logging in:
First, collect AFK rewards. Next, see how far you can push the main story. Then, knock out daily missions and free recruitment pulls, and finally handle your base, dungeons, events, and shop.
AFK rewards aren’t fixed—they tie to your main story progress. Before logging off, always try to beat one more boss. Even 1-2 extra stages add up to a big gap over time.
If there’s an AFK time cap, don’t wait till the cap to collect. For players who log in rarely, use phone notifications or fixed times to claim them—no need to keep the game open all day.
IV. Equipment System & Affix Selection Guide
A. Equipment Quality & How to Get It: Orange Gear Tips
Equipment comes from Jelly gacha, main story AFK, dungeons, events, and the shop. Early orange gear gives a big boost, but don’t dump all upgrade materials just for its flashy color.
New players focus on three base stats first: Attack, HP, Defense. Wear whichever has higher base stats. Once orange gear drops consistently, start matching affixes slowly—no need to waste resources on non-endgame gear too early.
Gradually shift to prioritizing affix matching instead of rushing it.
Equipment level matters too. A low-level orange gear will get replaced fast by a higher-level purple or new orange gear. So early upgrade resources go mostly to pushing main story—don’t max every piece’s level.
B. Top Affix Picks: Skill Crit, Attack Speed, Cooldown Reduction
For Skill Builds, core affixes are skill damage, skill crit chance, skill crit damage, cooldown reduction. If your skills already have long cooldowns, cooldown reduction gives way more value than small skill damage boosts.
For Gun Builds, prioritize regular attack damage, regular attack crit chance, attack speed, elemental damage. Attack speed hits more, but if your crit and damage are too low, stacking only speed means “fast hits, no damage”—useless.
For Pet Builds, go for pet damage, pet attack speed, pet crit, or summon buffs. This gear looks weak early, but later it’s a god-tier piece that’s impossible to replace—don’t accidentally sell good affix gear.
Keep at least two gear sets handy for safety.
First set for stage clearing: pick high AOE damage, short skill cooldowns, fast clear speed. Second set for boss fights: focus on single-target damage, crit chance, survival.
If you switch to Gun Build later, lock in gear with attack speed, regular attack crit, elemental damage now. Even if you use Skill Build now, don’t sell Gun-related affix gear—you’ll need it.
When filtering gear, ask three questions: Does base stat check out? Affixes fit your main build? Useful if I switch builds later? If none, sell it safely.
V. Skill System Deep Dive
A. Active vs. Passive Skills: Combo Logic & Recommended Setups
Active Skills deal direct damage, crowd control, or special effects.
Passive skills are designed to boost your overall damage output.
When progressing through stages, go for active skills that deal AoE (area-of-effect) burst, chain attacks, piercing damage, or DoT (damage-over-time), and pair them with effects that boost skill crit chance and reduce cooldowns. When you’re swarmed by tons of monsters, AoE damage is way more valuable than single-target scaling.
When fighting bosses, swap to high-scaling single-target skills, paired with cooldown reduction, damage boosts, or shield-breaking effects. Don’t set all your active skills to auto-cast—leave at least one burst skill manual, and only unleash its full power when the boss breaks its shield, enters a weakened state, or stops moving completely.
B. Skill Upgrade Priority: Focus Resources on Your Core Skills
A super common rookie mistake is leveling every skill just a tiny bit here and there.
It might make your power numbers look better early on, but you’ll have nothing reliable to clear big waves or finish tough stages—super inefficient. Instead, pick one core skill for clearing mobs, and another core skill for taking down bosses, then dump all your resources into those two.
Once your core skills get too pricey to level up, you can slowly start leveling passives and your second-tier skills. This keeps your stage progress fast, and you won’t get completely useless if one skill gets countered.
C. Summon Tickets and Banner Probability Analysis
Don’t burn all your summon tickets right away—first check if the current banner has any boosted skills, a pity system, or cumulative rewards, then decide if it’s worth pulling.
The real summon rates are listed in the game’s official "Probability Info" or banner details—don’t trust random numbers from the internet with no official proof. If the banner has no pity system, no limited rewards, and no core skills that fit your playstyle, free-to-play players should definitely save their tickets instead.
Always set a stopping point before pulling—like when you get your core skill, finish a pity cycle, or hit a milestone reward. No stopping point? You’ll end up dumping all your future event resources chasing "one more pull" that you think will get you the big win.
VI. Companion System and Bond Effects
A. Companion Types & Roles: Attack, Defense, Support
Attack companions are all about extra damage—great if you already have solid survival skills. Defense companions give shields, damage reduction, or defense boosts, perfect for clearing tough stages. Support companions can heal, lifesteal, buff your team, or debuff enemies.
Don’t just go for high-rarity companions! Some lower-rarity ones are way easier to star up, have consistent skills, and are actually more useful early to mid-game than a random high-rarity character.
If your main Slime has tons of damage but dies super fast, pair it with a shield or healer companion. If your Slime is super tough, just pick an attack companion to add more damage.
B. Companion Star-Up & Summon Tips
You get companions from diamonds, summon tickets, or events, and duplicate companions are used to star them up. Starring a companion doesn’t just boost basic stats—it can also improve their skill effects! So pulling duplicates isn’t a bad thing.
New players should first build a solid, working full team—no need to chase a single limited companion. Once you have all the key roles filled, focus your resources on 1-2 companions that fit your playstyle best.
If there’s an event with featured companions, cumulative summon rewards, or shard exchanges, save your summon tickets for that event—they’re usually way better value than pulling normally.
C. Capoo Collaboration Companions & Unique Bond Effects
The "Nekomusume Capoo" collaboration once released limited skins, mounts, star souls, and helper content. Some characters like Bodai Capoo even had their abilities fixed by official announcements due to weird bugs. That means collab characters’ power levels might change with balance patches—don’t just look at a new character’s early damage numbers. For limited skills, bonds, or collector content, make sure it fits your current playstyle before pulling—don’t dump all your resources just because it’s "limited".
The game has now moved to the "Shiroi Neko" collaboration version—check the Google Play update notes for exclusive login events, themed gameplay, and collab content. Whether Capoo collab limited items will return? We’ll have to wait for official announcements. Next up, let’s talk about base gameplay and dungeon guides.
A. Paintball Arena & Gene Lab: Tech Tree Priority Tips
The Paintball Arena is the key system that makes power gaps early on—don’t just mine resources at the start, push as deep as you can! Deeper levels give extra bonus gene drops, so it’s worth going further.
For the Gene Lab, prioritize tech that boosts resource production early on—things like increasing Paintball gain, gene drops, or crafting efficiency are super useful. For the left-side tech that just adds raw power, only level them enough to unlock the next stage, don’t waste resources on too many of them.
It’s simple: snagging extra resources early gives compound gains every day later. Just boosting one-time combat power might look good on numbers, but it’s not always efficient in the long run. Next up, let’s cover three dungeons: Jelly Gorge, Black Crystal Dragon Lair, and Desert Temple.
Jelly Gorge is mainly for obtaining Jelly and related shop resources. It’s perfect for players pushing Jelly levels or preparing for Jelly Sprint events.
Black Crystal Dragon Lair typically drops diamonds, gacha tickets, or high-value resources—this is a dungeon free-to-play (F2P) players absolutely can’t miss. Before entering, switch to single-target boss gear instead of AoE clear setup; don’t waste challenge tries!
Desert Temple is a mid-to-late game dungeon that tests both resources and combat power. If you keep failing, don’t force it—go back and upgrade your Genes, Gear Affixes, and main Skills first, then come back when you’re ready. Most player guides from Taiwan list these three dungeons as key sources for breaking through combat power bottlenecks.
Now let’s talk about the Offering System. The Fishing Pond yields Sushi Offerings and other growth resources. For upgrades, prioritize developing the Cultivation Pond first, then work on the Fishing Cabin and Tackle Testing Ground. Boost actual output before touching other features.
You can buy bait and feed from the Daily Shop, but don’t refresh it nonstop. Most player guides use price as a stop point—you don’t have to memorize a specific number, just avoid wasting resources on purchases where the value doesn’t align with cost.
When you get Sushi Offerings, don’t spend them all at once. If there’s an Offering Sprint or stacking event next week, hoarding them in advance usually lets you get both growth bonuses and event rewards—it’s way more worth it.
VIII. Event Guides & Limited-Time Rewards
A. Launch Event Schedule: First Week Events & Ranking Strategies
The official first-week launch events include Sea Beast Sprint, Stage Sprint, Slime Carnival, Hot Track, and other gacha draws. These events are usually linked together—when you’re progressing the main story, grabbing Offerings, and pulling for event items, you’ll stack multiple reward progress tracks at once. The key here is to hoard resources early: once you see an event teaser, hold onto the corresponding materials until the event starts to spend them all at once.
Even if you don’t want to compete for rankings, at least complete your personal stage rewards. Ranking battles might cost a lot of resources, but stage rewards are usually a major way F2P players boost their Artifacts, Mounts, and Gene systems.
B. Slime Carnival, Sea Beast Sprint & Other Limited-Time Events
Slime Carnival usually combines multiple daily goals, perfect for casual players to stack progress; Sea Beast Sprint is likely tied to Altars, Sea Beast attributes, or related resource consumption.
During events, don’t just look at how many resources the top-ranked player used. Calculate what stage rewards you can get with your own stock, then decide if you want to keep investing.
Gacha events like Hot Track are super easy to get carried away with. The safer strategy is to confirm how many pulls you need for the pity timer first, then decide to start. If you don’t have enough for the key pity, just hoard resources for the next event instead.
C. Event Resource Hoarding Timeline & Maximizing Rewards
In the first week, focus on pushing the main story, unlocking systems, and stacking Offerings. The second week usually has a Gene, Mount, or other growth sprint, so don’t use up all your Genes and Gears before events.
Event schedules might change based on server launch times, collab versions, or developer adjustments. So don’t follow dates from old guides—the real accurate info is in-game event countdowns and official announcements.
The most efficient playstyle isn’t hoarding resources forever or spending them all—just balance between what you need for main story progress and event stage rewards.
IX. Spending Analysis & Gacha Recommendations
A. Spending Priorities: Diamond Recruits, Companion Tickets, Skill Tickets
If you only plan to make small purchases, prioritize things that boost long-term gains or provide steady daily resources—they’re way more reliable than one-off random packages.
Players running a Skill-focused build should consider Skill Tickets first, but only if the current banner has the core Skill you need. Companion-focused players can go for Companion Tickets or limited-time companion events.
Buying diamonds directly is the most flexible option, but also the easiest to waste. Before spending, decide exactly what you’ll use diamonds for—otherwise you’ll end up wasting them all on shop refreshes and last-minute pity pulls.
B. Free Codes & Gift Codes List
The official verified universal codes available right now are:
PPSTYKR9R This code is valid until December 31, 2026, and is one of the reliable event codes confirmed to work right now. However, a heads up: other codes floating around in game communities might be media-exclusive packs, shopping point redemptions, single-use codes, or expired event codes—we can’t guarantee they’ll work for every account. The safest approach is to regularly check the official Facebook page, in-game announcements, and official updates.
For media event pages, don’t miss official exclusive deals!
Now, let’s clear up a common question: Is investing in mounts worth it? Gears are key items to upgrade mounts, and mounts give pretty big power boosts. So buying a small number of gears at the right time early in the game does help a lot with your map progression power.
For F2P players, aim to level up your mount enough to unlock main stage bonuses first. After that, pause spending resources and wait for mount-focused events—this way, you won’t get stuck delaying your map progress, and you can earn way more rewards during events, which is a super cost-effective choice.
Items like auto spray paint, extra AFK time, and long-term production boosts are usually more useful than single gacha pulls. But whether to buy them depends on how much you log in daily: If you don’t run AFK functions for long periods, these items won’t give you much value—you won’t make back their cost!
X. High-Difficulty Dungeon & Boss Battle Tips
A. Bullet Dodging & Movement Tricks
A lot of players think movement is just running in circles, but the most important first step is to figure out what kind of bullets are coming: For fan-shaped bullets, dash to the gaps on both sides immediately; For ring-shaped bullets, stand in the wide gaps early; For tracking bullets, just keep moving and slightly turn when the bullet gets close. Also, don’t stick to the screen edge the whole time—if you get cornered or hit with a ring attack, you’ll have no escape at all. The safest spot is usually “mid-range to the side”—you can clearly see the boss’s moves, plus you have two or more escape directions, which is super practical.
B. Boss Shield Break Mechanic & Weak Point Attacks
When fighting a boss, if it has a shield, don’t spam all your ultimates right away—use normal attacks and short-cooldown skills to chip the shield down slowly. Once it enters the vulnerable phase, unleash your highest multiplier skills all at once for way more damage. If the boss has an elemental weakness, don’t just swap one skill—adjust your full equipment setup, elemental skills, and companion synergy. A full elemental combo usually works way better than a single counter skill. Also check why you’re stuck: If you always run out of time right before beating the boss, boost your damage; If you keep dying in the second half, prioritize adding HP, shields, or life instead of mindlessly stacking attack power.
C. High Power Team Building & Map Progression Efficiency
Map progression teams need area damage and movement speed, while boss teams focus on single-target burst, shield break, and survivability. For team building: Skill builds go with damage boost or shield-type companions; Shooter pairs with attack speed, crit, or enemy defense down companions; Companion builds should prioritize full bond effects for better buffs. When stuck, don’t level up everything randomly—figure out the problem first: If clearing mobs is too slow, boost area damage; If boss runs out of time, boost single-target damage; If you keep dying, fix your movement and survivability. Solving the specific problem is the right way.
XI. Advanced Gameplay & AFK Optimization
A. Multi-Account AFK & Emulator Recommendations
The game already has a desktop web version, so single-account players should use the official web portal first—it cuts down emulator compatibility issues and is more stable. If you really want an Android emulator, go for common ones like LDPlayer. When setting up, make sure to allocate enough RAM and CPU cores, turn on high frame rate, and adjust based on your PC’s temperature. If you want to multi-account, lower each window’s resolution and frame rate first to avoid
All your accounts lag at the same time. A quick note: Emulators are great for managing multiple accounts easily, but never use unattended scripts, auto-clickers, or modify game data — these actions violate game rules and can get your accounts banned. Even though guides for Taiwan’s Leidian Emulator often list multi-accounting and performance tuning as key uses, you still need to follow the game's official Terms of Service!
Advanced Play Strategies
The gear-building directions for PVP and PVE are totally different: PVE is all about maxing out damage, while PVP needs to balance HP, defense, dodge, and crowd control resistance. In the Arena, both first-strike advantage and sustained damage matter: If you’re up against a burst-heavy opponent, switch to defense or shield-focused allies; if facing a stall-based team, you’ll need higher consistent damage. Also, the Kingdom mode rewards long-term participation and team contributions — don’t just chase single-match rankings; daily donations, quests, shop exchanges, and team events add up way more than random high-score matches!
C. Breaking Through Power Bottlenecks: How to Get Past Mid-Late Game Stuck Points
Stuck in the mid-late game? It’s usually for 4 common reasons: 1) Jelly items and account level are too low, making your gear stats way behind; 2) Your gear is high quality but the affix setup is wrong; 3) Your main skills are dragged down by uneven leveling; 4) Genes, Altars, mounts, and ally bonds aren’t upgraded in sync. Pro tip: Check each system one by one, don’t just stare at your total Power number — some buffs don’t blow up your Power but are game-changing in fights, like cooldown reduction, attack speed, element damage boost, and shield breaking. The real way to break through is to find your weakest link right now, not dump all resources into the most expensive system!
XII. Collab Events & IP Crossovers
A. Guabao the Cat Caterpillar & White Rotten Cat Collab Details
The Guabao the Cat Caterpillar collab was one of the game’s earliest big partnerships, and the limited-edition items and characters from it are still prized collectibles for many players today!
This collab brought tons of limited content: events, mounts, Red Soulstones, skins, helpers, and more. The devs shared split info for the Guabao collab and fixed earlier bugs with that character. Now the game has updated to the White Rotten Cat collab version, which includes a special login event, collab-themed gameplay, and new artifacts. They also mentioned that the collab artifact "Golden That Fish" triggers multiple types of damage on a regular basis — so it’s not just a fancy skin, it actually changes your battle setup!
Collab skins are mostly for collection and personalization, but some mounts, helpers, artifacts, and Soulstones come with stat boosts — so evaluate whether you need each one based on your playstyle.
If you’re just here for collectibles, check if collab skins are free via login or quests. If you’re focused on boosting Power, see if the collab items fit your go-to playstyle: Skill-focused, shooter, or ally-oriented.
Just because it’s limited doesn’t mean you have to pull for it! If a collab item only buffs a playstyle you haven’t trained at all, forcing a pull will just slow down your main team’s growth.
C. Skill & Strength Analysis of Limited-Time Collab Characters
Collab characters usually look super strong when they first drop, but their power can shift later due to balance tweaks or changes in the game meta. A classic example is Dharma Guabao — the devs had to hotfix them because they had a bug that dealt extra damage to players. When judging collab characters, focus on 3 things: Do they work well in both PVE and PVP? Do they need to be maxed to be useful? And can they fit into the current meta team after balance fixes?
The safest move here is to wait until players have completed their actual combat tests and the official has finished fixing all issues before investing a large amount of resources into training or summoning.XIII. Common Questions & Newbie Mistake-Avoidance Guide
A. Most Common Newbie Mistakes: Wasting Resources & Misaligned Development Direction
The first mistake new players make is leveling all skills evenly, which leaves them without a clear core damage focus and makes it hard to perform well in battles.
The second mistake is reinforcing every high-rarity piece of equipment they see, completely ignoring whether the equipment level and affixes fit their playstyle. This wastes resources and does nothing to improve actual combat performance.
The third mistake is spending all Red Gems on summoning companions, which leaves no stock left when you need Skill Tickets, Gears, or event-exclusive resources later—causing you to miss out on necessary development steps.
The fourth mistake is only focusing on combat power numbers while ignoring actual in-battle performance. Even a high-combat-power piece might be worse than a slightly lower-stat one if its affixes don't match your playstyle.
B. Fast Progression Tips: Path Selection to Avoid Early-Game Roadblocks
Early on, it's recommended to go with a Skill-focused playstyle—concentrate resources on training 1 Area of Effect (AoE) damage skill and 1 Single-Target damage skill. For equipment, prioritize base attack stats first; once you get an Orange-rank piece, then start picking ones with matching affixes.
Push the main storyline quests as much as possible first. If you get stuck, go back to work on Genes, Skills, companion development, and dungeon challenges. After each system upgrade, replay the stages—don't wait until all systems are maxed out to start testing your strength.
In the mid-game, start saving equipment that boosts Attack Speed, Normal Attack Critical Rate, and Elemental Damage to prepare for switching to a Gunplay or Elemental playstyle later.
C. Daily Must-Do List & Resource Accumulation Shortcuts
Here's what you should complete daily:
Claim AFK rewards, push main story progress, finish Daily Quests, use free Summon Tickets, tackle resource dungeons, handle Paintball Arena and Genie Factory claims, collect Fishing Pond rewards, check event quests, grab mail and login bonuses, and don't forget to check the shop for useful items to buy.
If time is limited, prioritize activities that have limited counts, are about to expire, or yield a large number of Red Gems. Main story progression and regular development can wait; event-limited content usually can't be recovered once missed, so don't miss out.
XIV. Guide Videos & Community Resource Recommendations
A. Popular YouTube Guide Channels & Video Recommendations
On YouTube, many Taiwanese game creators have made content about *Squeaky Slime* including launch diaries, Genie Factory guides, Sea Beast Altar strategies, Soul Star builds, playstyle transitions, and redemption code lists. Use keywords like "Squeaky Slime Day 1", "Squeaky Slime Genie Factory", or "Squeaky Slime Sea Beast Altar" to quickly find relevant videos.
Creators like "Abei Mobile Games" also keep compiling development paths for different days after launch, plus test content for the Frost playstyle—great for referencing actual in-game operation techniques. However, you still need to judge gift packs and pay-to-play advice in the videos on your own; don't directly apply a creator's progress to different servers. Additionally, LINE OpenChat is a good community discussion forum.
A. From Newbie to Pro: Growth Path Summary
In *Slime Whirl*, the beginner progression path is actually pretty straightforward—no need to waste time on unnecessary detours!
Early game: Push through levels with the Skill Build, focus resources on your main skills. For gear, prioritize base stats first, then roll for affixes once you have Orange rarity. Higher main story progress = better AFK gains—don’t just camp at your base grinding power; main story progress is the key to growth!
Mid game: Start gathering gear and resources for the Shooting Build, gradually adjust your team lineup to prepare for switching to Shooting or Element Builds later—build up your own powerful team!
Whether you’re going Element or Companion Builds, you need to pair them with the right gear. Boost your power through Gene Labs, Sea Beast Shrines, Mount development, and dungeon runs. Late game: Prepare multiple battle setups in advance so you can swap them quickly for different scenarios—like pushing stages, fighting BOSSes, or arena matches!
B. Stay Updated: Track Version Changes & New Events
Slime Whirl’s collab events, artifact releases, event schedules, and build balance changes come super fast! Remember the meta comp from the Capybara collab? You couldn’t just copy that when the White Cat version dropped later. Even a currently strong T0 skill might get adjusted once new artifacts or soul spirits come out.
Don’t just memorize one fixed playstyle—get the core logic behind each build! For example, Skill Builds rely on burst damage and cooldown reduction; Shooting Builds focus on attack speed and sustained DPS; Companion Builds care about star levels and bond effects. Master these basics, and you’ll easily adjust your setup no matter how the version changes!
C. Invite Players to Join the Slime Whirl Adventure
If you love AFK grinding but get bored of idle games with no real skill, Slime Whirl has its own charm. You can collect resources and upgrade gear at your own pace, or step up when you want a challenge—use positioning, skill combos, and team setup to clear tough stages!
New players don’t need to race to the top of the leaderboard or blow all your resources on limited gacha pulls. Pick a playstyle that fits you, grind daily tasks consistently, and save up for upcoming events. Your Slime will grow from a tiny, weak monster into a main hero that can take on the empire’s strongest foes!
The coolest part of this slime adventure isn’t just watching your combat power numbers climb higher and higher. It’s that every time you swap skills, adjust your gear, or change your team, you can clearly feel your battle playstyle shifting. Spend your resources wisely to build your very own slime army — that’s the core fun of *Slime Squeak* that everyone should take time to explore!