Rate the Land: Must-Copy Early Game Guide - Soar Easily From Day 1 to Month 1
What makes Shu Tu Zhi Bin so addictive isn’t pulling a 5-star general at the gacha—it’s the moment a new season launches, when you nail the right early-game expansion sequence to get a jump on resources, levels, and territory compared to everyone else. You’ll notice it immediately: while other players are still stuck on fighting level 3 territory, you’re already laying paths to take level 5 land and pushing forward with your alliance.
That said, early-game expansion is also the easiest part to mess up—one wrong move in the first couple days: picking a bad spawn point, messing up your first squad’s abilities, falling behind on recruitment and building timings, or mismanaging stamina and troop numbers, and you’ll be playing catch-up the entire rest of the time, burning out fast.
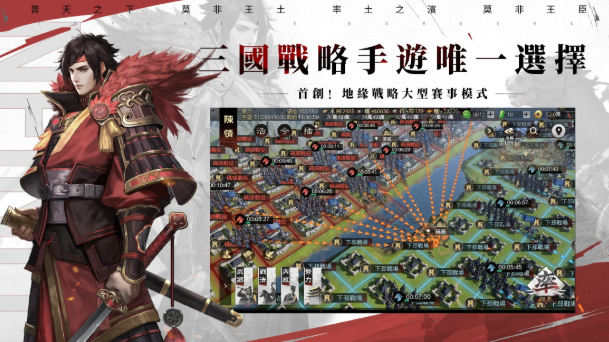
I. Intro and Game System Overview
A. Core Basics
Early-game expansion isn’t about how fast you click—it’s about the right order. Stick to the rhythm: buildings first → level up your generals first → equip the right abilities → prioritize conquering territory → lay paths → join an alliance on time, and you’ll secure your resource line faster than most players on the server.
B. Game Background & Unique Features
Shu Tu Zhi Bin is essentially a "season-based strategy sandbox" game:
-
You’re not playing a single-player campaign—on a massive single map, you’ll compete with thousands of real players for resources, territory, and strategic choke points.
-
Your entire power hinges on three words: resource line. The gap in production of wood, stone, iron, and grain decides whether you can recruit more troops, upgrade faster, and field a second squad—one snowballing advantage that gets bigger and bigger.
-
Gacha pulls are important, but they don’t win the game. What’s really impressive is the players who crush early expansion with only 3-star and 4-star generals—they get the rhythm, know how to prioritize, and use every point of stamina and grain on exactly what matters most.
C. New Player Quick Start
I’ve broken early expansion down into three main threads—new players just need to follow these:
-
Building Rhythm: Upgrade your main city first → resource buildings first → recruitment/camp buildings next → warehouses and tech research last.
-
Squad Rhythm: First squad must be stable enough to fight territory → second squad for support or extra damage → third squad only for alliance war needs.
-
Territory Rhythm: Secure level 1-2 territory → push for level 3 → lock in level 4 → then go for level 5.
II. Spawning & Location Strategy
A. Spawn Point Selection
New players always ask: "Can I pick any spawn point?" Let’s cut to the chase: You cannot—your spawn location will determine how easy your first 7 days of expansion are.
I use three main rules to pick a state or spawn spot:
-
Resource Density
Pick a spot with enough level 3, 4, and 5 territory nearby—avoid areas that are too crowded or too empty. Too crowded? You’ll get blocked from territory, roads, or paths before you even get started. Too empty? You’ll waste all your stamina running around laying paths, it’s brutal. -
Alliance Clustering
Shu Tu Zhi Bin is a team game—even if you’re great at solo expansion, you’ll get crushed in alliance wars. So early on, decide: Which alliance are you joining, and where is their main base? Spawning near allies means they can let you use their territory to lay paths, help you take city outskirts, and backup when enemies attack. -
Chokepoint & Warzone Heat
Don’t pick a frontline spot next to "hotly contested chokepoints" at the start—especially if you’re not a whale (big spender) or don’t have a strong alliance to protect you. New players who spawn too early often get their bases raided before they even stock up on resources, spending the whole season just playing catch-up, never getting to actually develop.
Section B: Terrain Analysis
Terrain has the most straightforward impact during the early-game development phase, mainly showing up in two key areas:
-
Movement Cost: The farther you are from resource zones or your allies, the more Stamina you’ll waste running around.
-
Defense and Engagement: Terrain like mountains, rivers, and outposts force enemies to take detours, saving you a ton of headaches from having your main base raided.
Here’s some super straight-up tips for picking your starting spot:
New players, prioritize staying close to your Alliance and resource zones—never pick a spot right next to an outpost. If you’re gunning for the leaderboards, you could consider setting up near the core resource zone—only if you can handle the pressure, though.
Part 3: Early-Game Lineup & General Officer Recommendations
Let’s be real here: Everyone pulls different Officers, so I’m not gonna force you to run a specific 5-star Officer.
I’ll break this down with "Early-Game Development Templates": Just plug the Officers you pull into the right template, and you’ll easily build a solid early-game squad.
A. 5-Star Officer Choices for Early-Game Start
The 5-star Officers I personally recommend for early-game development fall into three main categories:
1. Officers with consistent, reliable damage—hardly any luck needed
These Officers have huge perks: You never have to rely on skill procs, so they’re super stable when attacking territories, almost never backfiring.
Typical traits: Their damage comes from "Command Skills," "Passive Buffs," or a very fixed skill rotation.
2. Tank-type frontliners who can take hits and reduce damage
A lot of new players fail early-game not because they can’t win fights, but because their squad gets wiped first!
That’s why your first early-game squad must have an Officer who can take damage—or at least provide damage reduction, healing, or stat protection.
3. Support-type Officers with Crowd Control, Healing Block, or Defense Down effects
Support-type Officers are insanely useful when attacking higher-level territories:
-
Even if your damage is a bit low, Defense Down can make up for that gap
-
Can’t take hits? Crowd Control lets you dodge a whole round of attacks
-
Against Bosses or city defenses, Healing Block or Defense Penetration can straight up double your efficiency
If you pull a burst-focused Officer that’s built for PvP, they might not feel great during early-game development.
Early-game is all about "stability"—save burst Officers for your second squad or when you’re fighting other players.
B. Tips for Using 4-Star and Free Officers
The key to making 4-star or free Officers work in early-game development is two things:
1. Low cost, super easy to upgrade: You can max out their stars quickly, making their stats solid and reliable.
2. With the right skill setup, they’re just as stable: Don’t worry if 4-star Officers seem weak—what’s bad is wasting them by slapping on random skills.
Tips for F2P (Free-to-Play) and casual players: You’ll need at least these Officers ready before starting early-game development:
-
One frontline Officer who can take damage
-
One Officer with consistent damage
-
One Support or function-type Officer
C. Early-Game Lineup Building Strategy
You can think of your first early-game squad as a "three-piece set" to build:
-
Frontline: Responsible for minimizing your troop losses
-
Main Damage Dealer: Responsible for defeating the territory you’re attacking
-
Secondary Damage Dealer/Support Slot: Fills in gaps wherever needed—add damage if you’re short on it, or add support if you need more utility
To sum it up in one line: Prioritize reducing troop losses before worrying about attack speed.
The players who progress the fastest in early-game aren’t usually the ones with the highest power—they’re the ones with the lowest losses, who can keep attacking territories nonstop.
Part 4: Skill System & Building Guide
A. Key Basics of the Skill System
One thing new players often miss: A lot of skills in this game have super different levels of "stability"!
-
Some skills look insanely powerful,
But the truth is, their trigger rate is really low, activation is sluggish, and attacking enemy tiles basically feels like pure luck gambling.
Some skills might not have crazy high stats, but they’re super consistent—they work reliably every round, and your overall play experience will feel way better.
Here are my core principles for picking skills to use during the early game:
-
Consistency first, burst damage second
-
Protect your team before focusing on dealing damage
-
Fix your team’s weaknesses before boosting its strengths
B. Recommended Skills for Early Game (By Function)
I’m not gonna make you memorize a bunch of skill names—instead, I’ll categorize them by purpose so you can easily find alternatives:
Healing/Sustain Skills
They boost your troops’ HP, recover casualties, and balance out war fatigue during long fights—these are perfect for the early game.
C. Team & Skill Synergy
During the early game, the setup I hate seeing most is:
Here’s what I recommend instead:
V. Team Composition for the Start
A. Strongest F2P Start Team
The best start for free-to-play (F2P) players isn’t three specific characters—it’s a core strategy:
For your first team as an F2P player, here’s a "swap-friendly formula" you can use:
Plug in any good characters you get—don’t force yourself to chase the so-called "meta list" (current top picks), or you’ll throw off your start pace fast.
B. Positional Planning for Your 3 Troops
During the early game, this is how I usually arrange my team:
Simply put: Put your most fragile but critical character in the back camp, and your tankiest character in the vanguard.
C. Versatile Team Framework
Split your team into 3 core modules, and you can swap combinations super quickly:
Whenever you get stuck, just ask yourself: Which module is my team missing?
Don’t rush to replace the whole team or restart your account.
VI. Start Flow & Progress Planning
A. Day 1 Progress
On Day 1, you only have 3 main goals:
I’ve broken them down by time to make it easy:
1) Clear all newbie quests and main story until you hit a level wall
Newbie quests unlock key systems and give you tons of early resources, so don’t skip them. The worst thing you can do on Day 1 is try to attack tiles before unlocking core buildings and recruitment—you’re basically gimping yourself.
2) Prioritize upgrading the resource building you need most
Don’t level them all evenly—nothing sucks more early on than running out of a key resource and being stuck. Newbies usually struggle with food or iron first, but go with what your current progress demands.
3) Start with Level 1 or 2 tiles to build momentum—don’t rush Level 3 tiles
A lot of players rush to Level 3 tiles on Day 1, end up with crazy high losses, and spend forever recruiting troops to refill—by the time they’re ready, everyone else is already ahead. The right play here is:
4) Save stamina for "road building"
The biggest mistake on Day 1 is dumping all your stamina into attacking tiles—then when you want to expand on Day 2, you realize your routes aren’t set up, and your entire pace gets stuck.
B. First Week Progress
The main goal for the first week is: Get your resource line steady enough to recruit troops and level up buildings consistently, then transition from your first team to a second core group.
Here’s a super useful weekly rhythm:
Day 2: Grind Level 3 tiles consistently, start testing the waters for Level 4 tiles
Days 3-4: Focus on attacking Level 4 tiles, your resource line will start staying steady
By this point, you’ll notice a key thing:
It’s not about how many tiles you attack per day—it’s about: Can you keep attacking tiles with low losses, consistently?
Low losses → more continuous attacks → plenty of resources → faster building levels → your second team forms way sooner.
Days 5-7: Key window to push for Level 5 tiles
Whether you can hit Level 5 tiles in the first week is what makes the early game feel smooth or frustrating. But here’s the honest truth: If you’re not a whale (pay-to-win) player, or your main team isn’t ready yet, don’t force yourself to take on Level 5 tiles. Instead, do this:
C. First Month of the Game
Progress
The core of the first month boils down to two things:
You can split the month into three phases:
Week 2: Finish building your second basic team + start joining Alliance War daily events
Week 3: Enter the "Resources for War Merit" phase
You’ll notice once you hit this point:
Week 4: The season’s rhythm starts to stabilize
This is what you should focus on doing:
VII. Raiding & Combat Tutorial
A. Basic Raiding Tutorial
There are only two core goals of raiding:
The most common mistake new players make is rushing to attack any red territory they see, only to end up with heavy troop losses, no resources gained, and max aggro drawn to them.
The correct approach is:
B. Detailed Combat Mechanics
Combat in this game isn’t about just one power stat—it depends on:
-
Damage Reduction Tactics
Every troop you save means you can take one more territory spot during leveling.
The most valuable thing while farming isn’t landing critical hits—it’s not wasting time running back to base to resupply troops nonstop.-
Stable Damage Dealers
These include command skills, passive abilities, or high-trigger-rate chase skills—they’re perfect for expanding territory and farming resources. -
Control/Defense Reduction/Breakthrough Types
When you’re stuck on a territory level you can’t clear, it’s often not about lacking damage—it’s about not having enough defense break or defense reduction abilities.
-
All three generals only use damage-dealing tactics
-
No damage reduction, no healing, no control
Result? After taking your first territory, you take massive losses, then have to sit around waiting for troops to respawn—total waste of time.
-
Front Line: Must have at least one of damage reduction or healing
-
Main Damage Dealer: Stable damage + extra damage buffs/defense break
-
Support Slot: Fill in whatever your team is missing
-
First Team Can Attack Continuously: Low troop losses, no need to go back to base often to resupply
-
Second Team Can Reload: When the first team goes back to resupply, the second team can immediately go out to expand territory and secure resources
-
Third Team Takes Time to Build Up: Focus on developing it only once your resource lines are stable
-
Front Line: Can take damage
-
Middle Force: Stable damage
-
Rear Camp: High damage or support functions
-
Vanguard: In charge of taking damage—skills like damage reduction, taunt, or healing fit best here
-
Middle Unit: More of a support or sub-damage dealer—fills gaps in the team’s composition
-
Rear Camp Unit: Core damage dealer—protecting your Rear Camp means protecting your ability to take new territories
-
Survival Module: Damage reduction + healing
-
Damage Module: Stable damage + damage buffs/defense break
-
Targeted Module: Control/Heal Block/Special Attacks
-
Upgrade your main city level to unlock core buildings
-
Your first team can reliably clear level 2-3 territories
-
Resource buildings start producing steady output
-
Start with level 1-2 territories to slowly level up your team
-
Upgrade tactics and top up your troop numbers before moving further
-
Wait until you’re fully prepared to take on level 3 territories steadily
-
-
The main team should consistently clear Level 3 territories to level up.
-
Build whatever you're missing to unblock your progress.
-
Start moving towards dense clusters of Level 4 territories to open your path.
-
If you can take Level 4 territories smoothly, you'll have enough resources to start forming a second team.
-
If you keep getting stuck on Level 3, you'll fall way behind other players later on.
-
Use Level 4 territories to stabilize your levels, combat tactics, and troop counts.
-
Wait for allies to clear paths or provide backup.
-
Or wait for your second team to help clear nearby territories.
-
Shift from building your own solo team to coordinated alliance operations.
-
Move from just capturing territories to joining alliance wars, seizing passes, and controlling cities.
-
Your second team doesn't need to be super strong at first, but it needs to do at least two things:
-
Take over territory-clearing duties in rotation.
-
Provide support for other tasks.
-
-
The resources from solo territory captures are limited.
-
What really makes the difference is working with allies to capture cities, seize passes, and push forward battle lines.
From then on, prioritize resource use on: recruiting troops, training your third team, preparing for relocation, and setting up siege equipment.
-
Take stock of your core teams for this season.
-
Adjust their roles based on your alliance's strategy: frontline assault, logistical support, or mobile backup.
-
Shift your energy and resources from "solo territory clearing" to "following the team's rhythm".
-
Cut off your opponents' resource supply lines.
-
Force your opponents to waste troops on defense.
-
Work with your allies to target easy wins or strategically important territories first.
-
Make sure you can retreat and resupply safely after fights so your next moves go smoothly.
Many players run into situations where they get crushed even when they have more troops than their opponent — this usually boils down to a few key issues:
C. Efficient Resource Raiding Strategies
VIII. Fast Leveling & Troop Recruitment
A. Efficient Leveling Tips
My go-to leveling method is:
B. Troop Selection Principles & Combinations
The simplest rule for choosing troops during the early game is:
C. Troop Recruitment Time Planning Tips
Managing troop recruitment is like real-world operations: aim for "sustained operations" instead of cramming all troops at once.
My practical approach is:
A quick tip in one sentence: If your troops are still recruiting while you're offline, you gain extra development time over other players.
IX. Alliance & Social Systems
A. How to Pick an Alliance & When to Join
A lot of new players think, "I'll do my own early game for a week before joining an alliance" — only to realize after a week that:
My advice is 100%: The earlier you join an alliance, the better — especially if you're not a whale.
It's simple: you need allies to clear paths, share intel, and bail you out when things get tough.
B. Alliance Benefits & Core Functions
The most valuable thing about a good alliance isn't the tiny perks — it's:
C. Teamwork Strategies
New players usually fit best in one of these roles when they first join an alliance:
You don't have to be a frontline fighter right away — especially when your team is still new, pushing the front too early can get frustrating and demoralizing.
X. Common New Player Questions & Advanced Development Plans
A. New Player FAQ
Q1: On my first day...
Stuck on Tier 3 land and can’t beat it?
A: Don’t force it! Come back and do these 3 things first:
That’s all the super useful early-game guide for new players!
Question 2: When starting out, should I prioritize upgrading buildings or attacking land first?
Answer: You must "alternate between the two" strictly.
C. System & Gameplay Questions
Question 3: Does a higher-level Tactical Skill or one that uses more resources make it stronger?
Answer: Not necessarily! What matters most for starting out is "consistency". Some flashy, high-burst Tactical Skills that cost a ton of resources are just a waste if you can’t trigger their effects in battles.
D. Advanced Player Analysis
Question 4: Why do pro players have such perfect control over troop counts when starting out?
That’s because they prepare thoroughly right before hitting each land threshold:
E. F2P & Casual Player Tips
For F2P or casual players, you need to accept this truth first: You might not rush as fast as pay-to-win players, but you can be much more consistent than most others. Just follow these points:
XI. New Server Starter & Season Planning
A. New Server Starter Features
The cruelest part of a new server isn’t losing fights—it’s the advantage from the time gap:
B. Season System Overview
No matter how the Season changes its theme or visuals, the core gameplay logic is basically the same:
C. Meta Adaptation & Evolution
You need to improve at least once per Season:
XII. Advanced Tips & Community Resources
A. High-Level Starter Tactics
B. Player Community Resources
You should look for these things:
C. Newbie Perks & First Purchase
Here’s a super useful rule of thumb for you:
In *Shu Zhi Zhi Bin*, the core principle for starting out is: Every step has to be timed right.
Just follow this *Shu Zhi Zhi Bin* starter sequence—pick a good spawn point when you land, prioritize stability for your first squad, focus on survival Tactical Skills first, strictly push Tier 3→Tier4→Tier5 land as per their thresholds, get your second squad ready early to cover gaps, and join an Alliance ASAP to keep up with the group’s pace. You might not hit the server’s fastest start leaderboard, but you’ll definitely have a smooth experience without stressing to catch up on progress every day.
If you want this guide to be a custom version for your account, just provide three pieces of info:
-
-
Does your Tactical Skill’s trigger rate match the current battle turn rhythm?
-
Are your troop type counter matches and positioning correct?
-
Does your squad have enough damage mitigation and sustain output space?
-
Do you often get locked down by the enemy’s control chain and can’t do anything at all?
-
Your damage Tactical Skills rely too much on luck—if they don’t trigger at a critical moment, the whole thing collapses.
-
You have zero damage mitigation or heal skills, so the enemy will slowly grind your combat power down.
-
Your squad lacks utility roles, making it easy for enemies to counter you specifically.
-
For raiding, focus on "routes" not single points
Taking one piece of land won’t phase the enemy much, but cutting off their entire resource strip outside their main base will directly leave them short on food and iron, halting all subsequent development completely. -
First, cut off "links", then attack the "core"
Prioritize disconnecting the enemy’s outer land patches to make it super hard for them to get more land or move troops. Pushing towards their core will go much smoother after that. -
Don’t fight alone
Even if you’re a pro, 1v1 is super inefficient in *Shu Zhi Zhi Bin*. Pushing the battlefield in sync with your allies is the only way to deal real, devastating damage to the enemy.
-
Prioritize land you can definitely win steadily
-
-
Level up first
-
Take it step by step!
Never charge head-on into lands that are way too high-level! Because what usually happens if you do:
You might gain a few levels, but your recruitment time and resources will be completely drained, and your overall development pace will slow down a lot.
-
Prioritize using the troop type your team has the most resources for and that can heal troops the fastest
-
Your top priority should be building a team setup that minimizes losses
-
You can figure out detailed counter setups and switching troop types once your resource line is stable
-
Before every attack, make sure your troop count hits that "safe threshold"
-
Right after you return from an attack, immediately queue up recruitment so the process completes while you’re offline
-
Never let recruitment finish while you’re online — that’s a total waste of time
-
Your own lands are all messed up by other players taking them
-
The key checkpoints are already blocked by big alliances, so you can’t get in at all
-
The good guilds you want to join are either at the war merit cap or all their slots are full
-
There’s unified command and coordination
-
There’s a collective pace of laying roads and pushing forward
-
There’s a split between frontline combat and logistics support
As long as you keep up with the overall rhythm, even if your team is a bit weaker, you can still get your fair share of rewards.
-
Logistics & Road Crew: Help allies lay roads, connect lands, and reinforce their territories
-
Demolition Support Team: Prepare specialized demolition units to follow the main force when attacking towns
-
Home Defense Mobile Team: Prevent enemy flanking, finish off remaining enemies, and handle emergencies
-
Prioritize maxing out your skill levels first — don’t rush to level up troops before stabilizing your combat power
-
Adjust your team’s formation: Put damage dealers in the back row and tanks in the front row to absorb damage
-
Switch up your team’s troop types, picking ones that counter Level 3 lands specifically
-
First, top up your troops to hit that safe threshold number
-
Use Level 2 lands to level up your troops more first — make sure you’re in a stable state before pushing
If you charge in recklessly, you’ll just waste valuable resources and time.
-
You need to seize lands to get enough resources
-
You also need to upgrade buildings to increase recruitment speed and troop caps
Don’t just focus on one thing: Upgrade any buildings you can, take any lands you can, but prioritize stability over speed first.
-
Before attacking Level 3 lands, make sure your troops have enough damage reduction or healing capabilities
-
Before pushing Level 4 lands, keep your troops and levels within a safe range
-
When getting ready for Level 5 lands, train a second team to take over — this keeps your pace from getting stuck if your main team fails
-
Don’t ever charge lands you clearly can’t beat
-
Focus all resources on your first main team
-
Train a second team quickly to take over
-
Join a guild as early as possible and follow the group’s rhythm
That way, you’ll find you don’t fall too far behind.
Players with Level 5 lands will see their troop counts and building upgrades skyrocket as if using a speed boost. On new servers, you must prioritize the "Day 1 Early-Game Progression Order" and "Garrison Arrangements for Offline Periods".
-
Players who start farming 6 hours earlier will have a much faster resource accumulation rate than you
-
Getting to Level 4 a day earlier…
-
During the early game phase, quickly ramp up your resource chain.
-
Build your second and third squads.
-
Join a guild, participate in sieges, and control key objectives.
-
Adjust your playstyle based on your guild’s strategy.
Stick to this core path, and you’ll never go off track in any season.
-
Last season, you might have only used one squad to capture lands.
-
This season, learn to use two squads in a relay to advance.
-
Last season, you might have just followed the crowd to attack cities.
-
This season, learn to lay roads, take choke points, and cut off enemy supply lines.
The more you evolve your playstyle, the less you’ll rely on luck.
-
Stamina Management: Never waste stamina on meaningless moves!
Every unnecessary tile you step on means one less land you can take. Plan carefully before moving—don’t waste steps! -
Casualty Control: Capturing lands isn’t just about winning; it’s about how many troops you have left afterward!
Those who can keep conquering with minimal losses are true early-game masters. -
Pacing: Don’t stubbornly hold out when you need to retreat and resupply—level up your tactics immediately when possible!
Many players fail because they overextend, leading to consecutive losses for the next two days.
-
Players who share real season pacing strategies
-
Content with squad-building insights
Not just guides that throw a "Top General List"—lists won’t help you capture lands; the correct order does.
-
Only invest in things that help you build a full squad faster.
-
Skip things that just make your numbers look better but don’t affect early-game pacing for now.
-
The early-game core generals you’ve pulled this season
-
Useful tactics you currently have, like damage reduction, healing, or consistent damage
-
What level lands you’re currently stuck on
I’ll create a more accurate "Day 1 to Day 7 Early-Game Action Plan" based on your general pool and tactic library, so you can avoid mistakes, reduce casualties, and hit the growth phase faster.
-