LifeAfter: Silent Plains Chest Codes - Tested Cheat Sheet + 16-Point Map-Running Guide
If you've been grinding through the *LifeAfter* "Silent Plains" map lately, you're definitely not alone when you spot a safe on the map and just can't resist reaching to unlock it—only to freeze in front of the keyboard, wondering: How many numbers do I even need to input? Where do I find the key? To make things worse, this map loves the trick where things look super close on the map, but you actually have to run all the way around a huge circle to get there. New players who come here for the first time often miss the chests, or get chased by infected creatures everywhere while running around, so they just give up entirely.
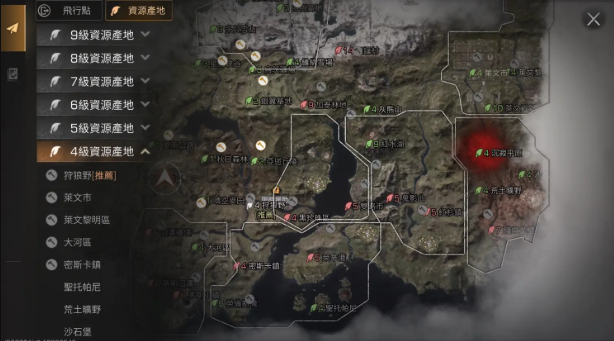
I. Opening Guide and Basic Introduction to "Silent Plains"
A. Core Gameplay Focus
The core feature of the "Silent Plains" map can be summed up in one sentence: It looks like you're just wandering around a suburban town, but in reality, it's a mixed challenge of "Zone Loot Running + Puzzles + Key Finding + Password Memorization". You don't need to memorize answers blindly—you just need to master three key skills:
-
How to identify password boxes and where password hints are usually hidden
-
What do the "key interactive objects" corresponding to key chests look like, and where do they usually appear
-
How to plan your route to avoid detours and unnecessary backtracking
This guide is tailored exactly to what you need, with every part written to be super easy to understand so you can actually put it into practice: Next time you see a specific building or spot, you'll immediately think "This is probably a chest of this type" and "What should I look for first".
B. Version Context and Map Rhythm
The "Silent Plains" map usually cycles with specific events or other zones, so its gameplay rhythm is generally like this:
-
It's open for a period → Players rush around frantically to grab chests
-
A few days or weeks later, it cycles out → Current progress resets or switches to the next zone
-
Next time players come back, they have to explore the map all over again
So if you want to "master this map in one go", this guide is perfect for you: Once you learn the right route, you can speedrun it directly next time this map cycles back, instead of wasting time starting from scratch every time.
II. Detailed Guide to Safe Passwords
A. Four Common Safe Passwords
Let's start with what everyone cares most about: The four common safe passwords in "Silent Plains" are:
-
006
-
1205
-
3326
-
8254
But let's get one thing straight first: Passwords can sometimes get "minor adjustments or changes to hint methods" depending on the cycle or event version. So you can't just memorize numbers blindly—you need to know, if the safe doesn't open after entering the password today, what should you check:
-
Am I standing in the wrong spot to interact?
-
Is this chest actually a key chest instead of a password chest?
-
Did this week's cycle have any changes?
The FAQ section later will teach you how to figure out these issues.
B. Common Issues with Password Input and Unlocking
The most common problems with password boxes usually aren't about not knowing the password—they're about running into these situations while doing it:
-
The input screen pops up, but gets canceled immediately because you get hit by a monster
→ Solution: Clear out nearby monsters first, or pull them away and block them using terrain, then come back to input the password. -
You think it's a password box, but it actually needs a key to open
→ Solution: Check the chest's own text prompts or interaction hints—some will clearly say "needs a key" or have words like "look for clues". -
A teammate opened the chest before you found the password hint
→ Solution: If you're running the map with a group, it's recommended to
Let’s sort this out via voice chat first:
-
I’ll handle the locker code input—you guys go grab the key boxes first
-
Or split up by area directly: whoever takes which side of the zone
Enter
Here are two super practical tricks I’ve found while playing:
-
Key in the whole code slowly first, confirm every button responds properly
-
Don’t rush to leave the screen after entering! Wait for the system to confirm the unlock succeeded before moving—you don’t wanna waste all your effort
C. Code Forgetting Prevention Plan
So many people I know space out when running Silent Plains and forget the codes, especially when they get to the third locker—their brain just freezes.
Here are three "lazy but super useful" methods that’ll guarantee you never forget the codes again:
-
Turn the four-digit codes into a simple mantra
-
006: Sounds like "zero-zero-six"—link it to an intuitive mantra like "loot stuff at the start"
-
1205: Easy to remember, just like a regular date
-
3326: Break it down into the simple logic "33 becomes 26"
-
8254: Treat it like a clap rhythm: 8-2-5-4. You don’t have to use my method—just make the code stick in your head as a fixed rhythm, so you can recall it anytime.
-
-
Pin all four sets of codes at the very top of your phone’s notes app
I’ve got a line fixed at the top of my phone notes:
"Silent Plains Codes: 006 / 1205 / 3326 / 8254"
I can see it anytime I swipe casually while running around—super convenient. -
Use the "locker type → code" matching method
If you run the map often, you’ll gradually build muscle memory:-
A certain type of indoor mechanism locker will always use one set of codes
-
Warehouse or kitchen area lockers will commonly use another set
No need to memorize locations by heart—just remember that "vibe".
-
III. Full 16 Locker Locations Guide
I’ll explain this with "area classification + terrain features" because "Silent Plains" might have slight differences across different language interfaces—following scene features is way more useful than memorizing coordinates blindly.
A. Mountain Area Lockers
Location 1: Near Mountain Medical/First Aid Building
This spot has super distinct features: An indoor space with a medical vibe, laid out like a clinic or first aid station.
Two most common pitfalls here:
-
The target locker might be stuck in an indoor corner, blocked by tables or partitions that block your view
-
Or you rush into the house too fast, a monster spawned at the door pushes you away, making interaction impossible
My running approach is:
First walk around the building perimeter to confirm there are no other entrances, then go inside slowly to look for the locker.
Location 2: Near Mountain Edges or Observation Points
The second common locker in the mountain area is placed in spots like:
-
A corner that looks totally safe but you’d never think of
Like next to wooden platforms, temporary sheds, or high points with good views.
If you can’t find it, remember this line:
"Lockers in the mountain area are either hidden in caves or places you’re too lazy to climb up to."
B. Agricultural Area Lockers
The agricultural area is definitely a nightmare for many players because the scenes are all similar: rice fields, hay bales, fertilizer, mills… everything looks alike, so it’s super easy to get confused and lost on the first run.
Location 3: Near Planting Areas / Rice Hay Bales
The codes for these lockers aren’t usually too complicated, but the most annoying part is blocked views:
-
The locker might be next to hay bales, in the middle of a field, or in a spot you thought was just decor
My tip when running the agricultural area:
Tilt your view down—you’ll spot the chest outline way clearer than when looking straight ahead.
Position 4: Fertilizer Zone
The go-to trick for this area: The key is never near the chest; it’s always in the “last place you’d want to go”.
Think spots next to septic tanks, stinky drainage ditches, or any interactive point that just looks gross.
My personal pro tip:
When you hit the Fertilizer Zone, don’t rush to hunt for the chest first—start by grabbing shiny small items on the ground, or look for interactive points with hints
Grab the key, then come back for the chest—your efficiency will triple instantly.
Position 5: Mill / Mechanical Interactive Spot
The most common scenario here: you’ll need to move a mechanical object to trigger the next steps.
You might have to do a specific action first before the hidden chest even shows up
So if you walk into the Mill and it feels totally empty, don’t overthink it—go grab these things first:
-
Is there any object you can push?
-
Is there any mechanical device that’s “stuck and won’t move”?
-
Is there any interactive point with a hint like “Needs Repair” or “Needs Activation”?
C. Quality Inspection & Storage Zones
This area has a strong industrial vibe everywhere—filled with shelves, storage rooms, offices, and a clear quality inspection center scene.
Position 6: Quality Inspection Center
The trick here is extra sneaky: This chest looks just like a manager’s private safe, hidden in a more discreet indoor corner.
Watch for these details:
-
Some quality inspection rooms are designed with two floors or a mezzanine
-
You have to circle to the inner side to find the interactive point
Position 7: Hidden Area in Quality Inspection Center
This is the kind of hidden chest designers made just for fun—like “I hid it so artistically”:
-
Walls that look like murals, or movable cover objects
-
Open it, and there’s a cellar or hidden compartment
My advice when exploring the Quality Inspection Center—keep an eye out for these things:
-
Decorations that don’t fit the whole scene’s style
-
Clear interactive marks on walls
Position 8: Supply Warehouse
Key hiding spots in the warehouse zone are usually:
-
Small side warehouses or rooms next to it
-
In a gap between shelves
-
Or you have to grab the key first before coming back to open the main warehouse chest
I use the “reverse search method” myself:
I search all small rooms around the warehouse first, grab the key, then head to the main warehouse to open the chest—super time-saving!
D. Community & Living Zones
The Living Zone is actually the easiest to find, but also the easiest to miss—since you’ll easily get tricked by things that “just look like decorations”.
Position 9: Friendly House / Resident Yard
Keys here are almost always hidden in these spots:
-
On balloons, tree decorations, or small destructible objects
If you don’t break these, you’ll always feel like you missed a critical clue
So my go-to habit for living zones:
When you see weird hanging items, balloons, or out-of-place decorations, shoot them quickly—something might drop!
Position 10: Village Chief’s House / Manager’s Residence
Chests in houses like the Village Chief’s love hiding here:
-
A run-down outhouse
-
Backyard corner
-
Or indoor spots you think are just clutter piles
When I search these houses, I always do two things first:
-
Circle the outside to find the back door or side door
-
Search from the innermost part of the house outward
Position 11: Production Zone
The Production Zone is full of stockpiles, hay bales, and goods everywhere—looks super busy.
Chests here are usually placed right next to stockpiles, and all you need to do is one thing:
Walk a full circle right next to the stockpile
Way faster than just random searching around the area!
Spot 12: Drying Area / Near Vehicle Repair Zone
Places like the Drying Area—where you’ll find cars, tools, and that "full-on repair vibe"—usually work like this:
-
You need to first dismantle or repair something
-
before the key drops out
If you walk into the Drying Area and only see cars, no chest?
Hurriedly look for "interactable things like car hoods, parts, or bicycles"
Most of the time, the chest won’t even spawn unless you trigger an interaction.
E. Special Area Chests
I usually call these spots the "final wrap-up zones"—they’re either in functional areas or near mission points/bases.
Spot 13: Cooking Area
The Cooking Area looks like this: pots/stoves all over the place, and a food ingredient area.
For chests here, just remember one thing:
"If you see a keyboard in the cooking zone? It’s a code chest"
Then test with the 4 codes you have—you’ll get it fast.
Spot14: Storage Area
This Storage Area isn’t like the previous supply warehouse—it’s more like a big warehouse with neatly arranged shelves.
Code chests are usually hidden:
-
In the corners of the warehouse
Or at the back near the shelves
Spot15: Gas Station / Supply Stop
If you spot a gas station or supply stop on the road, 9 times out of 10 it’s a "route marker chest". When exploring the map, use it like a navigation sign—when you reach here, you’re on the right track! It’s usually tucked between two zones, so looting it lets you move to the next area smoothly—saves so much time.
Spot16: Expedition Team Base / Near Mission Exit
A lot of players overlook chests "near mission endings"—the reason is super simple: after finishing a mission, you just want to GTFO! But in the Silent Plains, they love hiding chests as Easter eggs in the area you’re about to leave.
My tip: when you reach the base, don’t rush to leave—scan the surrounding area first, especially places like the door, sides, behind tents—easy-to-miss spots.
IV. Chest Acquisition Methods & Tips
A. Fast Opening for Non-Code Chests
The core rule for fast opening non-code chests is: See it, open it—don’t overthink it! But watch out for two traps:
-
Spawned monsters nearby will interrupt your action as soon as you get close
-
Chests hidden out of your camera view—you’ll just walk past thinking it’s not there
The safest way:
-
Raise your camera → first confirm where the chest is
-
Clear 2-3 nearby monsters → then open it.
This avoids a lot of "I totally saw that chest, but a monster interrupted me" frustration.
B. Key Acquisition Mechanics
Keys usually come from 4 scenarios:
-
Pickable items on the ground
-
Dropped from destructible objects
-
Triggered by interactive mechanisms
-
Spawn after completing a mission/event
If you’re short on keys, don’t just stare at chests—do the opposite:
First look for "the most out-of-place thing in this area". For example:
-
A super bright object in the middle of a farming area
-
Something weird hanging from a tree in a residential area
-
A painting that’s "too new" on an industrial zone wall
That’s 90% the clue.
C. Special Unlocking Mechanics
Special unlocking mechanics usually show up in:
-
Quality Control Center
-
Mill
-
Drying/Repair Area
From my experience:
If you see an interaction prompt that’s not "Open" but "Move/Repair/Check", then this area most likely has a Mechanism Chest.
Common Difficulty Points & Easy Misses
The 3 most common types of crates you’ll miss:
-
The crate you thought was just decorative
-
The crate you skipped after finishing a quest
-
The crate that won’t spawn unless you trigger an interaction first
Just remember one thing:
“The crates in the Silent Plains love showing up exactly where you want to cut corners the most.”
That way, you won’t miss too many.
V. Efficient Strategies & Route Planning
A. Complete Guide for New Players
The recommended route for new players is: Outer ring first, inner ring second, final outpost last.
-
Head for the highlands first
-
Move down to the agricultural zone next
-
Then hit the industrial/warehouse zone
-
Finish by clearing the residential zone
-
End at the outpost/exit
New players should avoid this at all costs:
Stuck on a crate → Wasted 10 minutes hovering around → Get killed by zombies/Lost time
If you get stuck on one, mark it first.
Push forward to collect resources first, then circle back to grab any missed targets at the end—this will boost your overall efficiency a lot.
B. Advanced Route Optimization
Advanced players focus on cutting down backtracking and wasted moves—no taking detours.
When I run the map, I prioritize in this order:
-
Grab key-specific crates first, then tackle code-locked ones: Most key-linked crates have pre-collection quests nearby, so you can pick them up while you’re there.
-
Handle puzzle zones early: For areas with puzzles like the mill or drying racks, finish the puzzles first so you can grab crates along the way—no need to come back a second time.
-
Clear all destructibles in residential zones in one go: When entering the residential area, destroy every decor/object that looks breakable to avoid missing hidden keys or crates.
C. Pro Speedrun Tips
Real speedrun pros don’t rely on moving fast—they nail these three tricks:
-
Always keep your camera high: Use an overhead view to spot crate outlines instead of staring at the ground for details—saves time and prevents misses.
-
Tap interaction prompts immediately: Many puzzle crates only spawn after you trigger an interaction—don’t miss the chance.
-
Stick to a fixed routine: Spot a crate → Check its type → Deal with it immediately
-
Code-locked crates: Enter the code and open it right away
-
Key crates: Look for nearby interactables or destructibles first
-
Puzzle crates: Find pushable/repairable objects first
-
The real core of speedrunning:
You’re not just looking for crates—you’re finding the pattern of where they spawn.
VI. Silent Plains Gameplay Breakdown
A. Forbidden Zone Mechanics & Rules
The Silent Plains is usually part of a Forbidden Zone or gold rush-style mode, with a few common rules:
-
Clearly defined exploration progress
-
Regular rotation/reset
-
Reward/crate quantity cap
-
Zombie pressure (attacks)
Think of it as a “time-limited job”:
The earlier you finish all crates, the better. If you wait until the last day, more players show up and zombies get stronger—your efficiency drops hard.
B. Resource & Reward System
What you get from crates mostly ties to your character’s progression, so you’ll often think:
Rewards from alt accounts are different from main accounts.
-
Even on the same map, players may get different loots when looting.
So stop obsessing over "Why can't I get good stuff?" What you should check is this:
Did you collect the maximum number of chests during this map run?
As long as you grab all chests, you'll make a steady profit in the long run.
C. Classes & Loadout Tips
Let's put this in a way players can relate: For looting chests in the Silent Plain, the key is to survive and cut down on unnecessary running.
-
Solo Map Run: We recommend a loadout that can protect yourself and clear monsters quickly. After all, when playing alone, you have to balance finding chests and dealing with Infected.
-
Duos/Small Teams: Working in a team is way more efficient.
-
One person is in charge of finding keys and solving mechanisms.
-
The other is responsible for clearing monsters and opening code chests.
Splitting up is way faster than running around together.
-
About item prep:
-
At the very least, have items to restore HP, escape combat, and move quickly.
-
Really don't skimp on supplies. Saving a little might mean wasting tons of time respawning or traveling, which is not worth it.
VII. Version Updates & Environment Assessment
A. Content of Polar Star Version
If the Silent Plain is tied to the version event, there are usually two scenarios:
-
Players return to do map runs → Competition heats up, so you need to find chests faster.
-
Rotation pace speeds up → You need to plan a fast route first.
The conclusion is simple:
During events, you must grab all chests before doing anything else.
If you delay, not only will you be short on time, you'll also face more players competing for chests—double the pain.
B. Compare with Other Zones
I think the unique features of the Silent Plain are:
-
It has more puzzles than other zones, so you can't just run through to get all chests.
-
The terrain is complex, making hidden chests easy to miss.
-
The boundary between residential and industrial areas is often overlooked.
The terrain is so mixed that it always feels like you're casually strolling when you get ambushed from the dark.
If you've run zones like "linear routes, opening chests along the way" before, the Silent Plain will feel like a huge treasure map.
A big treasure hunt game.
C. Long-Term Development Assessment
In terms of long-term gameplay, the Silent Plain is perfect for building a habit of stable income:
-
Each rotation comes → Follow the fixed route → Steady income comes in.
Once you're familiar with this map, it's like an ATM during each rotation period.
VIII. FAQ & Advanced Tips
A. Code & Unlocking Issues
Q1: I tried entering codes like 006, 1205, 3326, 8254 but couldn't open it. Did the code change?
A: Don't rush to blame game bugs! First check three key points:
-
Does this chest actually require a key to open?
-
Are you standing in the correct interaction position?
-
Were you interrupted by monsters when entering the code?
After checking all three, then consider if it's a version adjustment or a different type of chest.
Q2: I don't know if this chest needs a code or a key. How to tell quickly?
A: The most intuitive way is to look at the interaction prompt and combine it with the scene:
-
Has a keyboard interface or input disk → High chance it's a code chest
-
There are collectible items, destructible objects, or a "find clues" prompt around → High chance you need a key or mechanism to unlock it.
B. Chest Finding Issues
Q3: I just can't find one more chest. What should I do?
A: Hurry back to check...
The three easiest areas to miss:
-
Near outposts or exits
-
Behind hidden doors or murals
-
Hidden spots that only show up when you interact, like windmills or drying areas
C. Mechanism & Reward Questions
Q4: Why do my friend and I get different rewards from the same crate?
A: Rewards from many crates in forbidden zones depend on your character’s progression, level, and how far you are in the game. Differences are totally normal! Don’t stress over one crate’s contents—focus on grabbing all of them.
D. Progression & Optimization Questions
Q5: If I die halfway through a run, is reviving a waste?
A: You don’t lose items—you lose precious time! New players should prioritize safety first:
-
Clear all enemies before interacting with anything
-
Skip areas if you get stuck
Go for speedruns only once you know the map inside and out.
IX. Additional Content & Related Guides
A. Forbidden Zone Crate Comparisons
If you treat forbidden zone crate runs as a reliable loot source, I recommend making your own "shortest route notes" for each zone:
-
Which areas to grab keys first
-
Which areas to solve codes first
-
Which areas to finish last
You’ll notice once you’re good at it, you can cut your run time by over half.
B. Full Forbidden Zone System Breakdown
The core of forbidden zone gameplay is actually this:
Getting the most "accumulable resource rewards" in the least amount of time.
So you don’t need to grind combat power—you need to practice: route planning, scene awareness, and rhythm control.
C. Heart-Pounding Forbidden Zone Experience
If you love this "map exploration + hidden crates" style of gameplay, you’ll probably love stuff like "Heart-Pounding Forbidden Zone." They all have one thing in common:
-
You’re definitely going to miss some crates
-
But once you know it well, it’s super rewarding
Because you’ll be way faster than everyone else.
D. Future Update Outlook
As long as the game keeps releasing new forbidden zone rotations, Silent Plains won’t disappear.
So I suggest treating this map as a long-term investment:
-
Run the whole map thoroughly once first
-
Come back for the next rotation and you can loot everything immediately
That’s what veteran players call "time-saving gameplay."
Silent Plains is basically a map that’s great at hiding things, setting traps, but once you know it well, it’s extremely profitable. You just need to stick to three core points:
-
Memorize the four common code combinations
-
Understand the scene-based rules for keys and mechanisms
Beyond grasping the game’s rhythm rules, you also need to master the small trick of sticking to a fixed route. Next time you step into Silent Plains, don’t get lost searching for crates—follow your pre-planned route and harvest resources efficiently along the rhythm!