Infinite Lagrange: Beginner to Advanced - Base Fleet Combat Pay-to-Play Guide
When you first start out in Infinite Lagrange, you'll most likely hit two huge headaches right off the bat: First, which buildings should I prioritize upgrading for my base? Second, why did my entire fleet get wiped out instantly even though I spent ages putting it together? I tested this myself when I started playing, it was rough – I got completely crushed by some random veteran player's fleet that passed by. I had to slog through the system and figure out the gameplay bit by bit before I really got the hang of it. This game isn't just about piling up combat power, it's all about mastering strategy and controlling the pace. For this guide, I'll break down the key points new players run into from a veteran player's perspective, walking you step by step from starting fresh, expanding your territory later, how to work with plan circles, fleet composition, what real space battles really depend on, and finally talk about the right mindset for paying and what's worth spending money on.
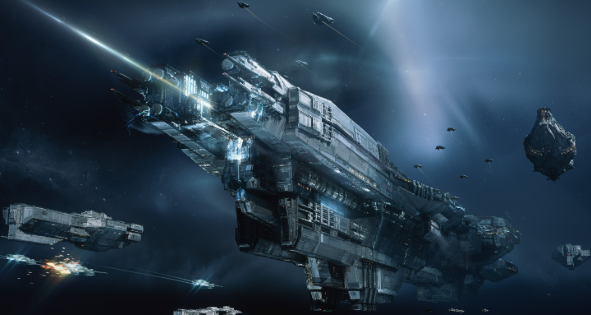
I. Opening Intro & Game Overview
A. Core Gameplay Introduction
Infinite Lagrange is a space strategy game that blends three core elements: base building and management, fleet development and customization, and galaxy territory competition. Players need more than just a variety of warships – they also have to pay attention to the pace of space battles, planning logistics supply lines, and expanding their faction's territory.
B. Game Background & Core Design
The game's setting is pretty straightforward: humans have mastered interstellar travel, and you take on the role of a commander of a faction. You don't need to overthink the complicated plot – the focus is on its deep, real-world logistics system for space combat:
-
To get resources, you have to first find the right mineral nodes, deploy transport fleets to haul them, and set up escort fleets to protect those supply routes.
-
To expand your territory, you need to build outposts or sub-bases to extend your faction's control range.
-
To join battles, you have to carefully calculate travel time and assess if the enemy will intercept you along the way.
The official has repeatedly emphasized in system previews that "outpost construction, territory occupation, and faction control" are the core loop of this game.
II. Complete New Player Guide
A. Must-Know Tips for New Players
1) This is NOT a game where getting top-tier ship blueprints makes you unbeatable
Getting a good ship blueprint is exciting, but if your base construction is messy, your resource supply lines break, or your fleet composition is bad, you'll still get completely crushed. A lot of new players don't lose because they don't have enough firepower – they lose because of bad timing for deploying their fleets and poor logistics planning.
2) Every time you send your fleet out, it's essentially a cost of time
You need to calculate the time it takes to get from your base to mineral nodes, frontline outposts, or rally points accurately – because time equals resources equals growth opportunities. Wondering why some factions expand their map super fast? It's not because they spend a ton of money – it's because their routes and outpost placements are super efficient.
3) First, figure out your "role on this galaxy map"
Here are the roles you can choose:
-
Resource Farmer: Specializes in mining and supplying resources
-
Combatant: Specializes in battles and territory competition
-
Logistics Engineer: Specializes in supporting work like fleet repair and base construction
You can build a mixed role, but new players should pick a core role first to avoid being mediocre at everything.
B. Early Game Development Route Planning
I'll share the most "no-fail" development route for new players:
Phase 1: Prioritize stabilizing your base's construction pace
-
Prioritize upgrading core buildings related to resource production, resource storage, and basic shipbuilding.
-
For your early fleet, don't chase flashy compositions – focus on basic functions: being able to fight, take damage, and repair.
-
Fix your regular mining routes and don't swap mining spots randomly.
Phase 2: Clear resource nodes around your base and accumulate basic supplies
-
Prioritize mining nodes that are close and have good defense
Stick to relatively safe resource nodes—stable resource supply is everything.
-
As long as you collect resources steadily, you can build fleets consistently, laying the foundation for future territory expansion.
-
Don’t eye those high-level resource mines far away; rushing into expeditions will likely get you intercepted on the way, leading to heavy losses.
-
If you’re in an alliance, following the alliance’s rally operations will save you a ton of unnecessary trouble.
-
If you don’t have an alliance yet, that’s totally fine, but stay more conservative: first make sure you can hold the territory you’ve already claimed.
C. Quick Start Checklist for New Players
New players only need to confirm these things every day:
-
Is there an empty spot in your base building upgrade queue?
-
Are your resource-gathering fleets running their tasks normally?
-
Is your resource storage sufficient?
That’s all the core points for new players—hope this helps you avoid some pitfalls along the way.
-
Is your shipyard/production line stalled?
-
Did you miss any reconnaissance or exploration missions?
-
Did you read the messages your alliance sent?
III. Base Building & Upgrading System
A. Base Level & Development
Your base is literally the heart of your combat operations! If your base level doesn’t keep up, your ship cap, shipyard efficiency, and logistics capacity will all be crippled. A lot of players in this game think their damage output is the problem, but actually, the root cause is always a lagging base level.
When playing this game, I usually split base upgrading into three main focuses:
-
Production Line Focus: Can you build larger, more powerful warships?
-
Economic Line Focus: Can your resources support continuous shipbuilding, fleet maintenance, and long-distance combat needs?
-
Logistics Line Focus: Your warehouse capacity, transport speed, repair efficiency, and supply coverage directly determine if you can conduct long-term expedition operations.
B. Basic Building System
You don’t need to memorize every building’s name—just understanding the priority logic is enough!
Priority 1: Resource-Related
-
If your resource production isn’t enough, you can’t do anything later in the game.
-
If your warehouse is too small, the resources you worked hard to gather won’t fit, which is totally wasted. So in the early game, you must upgrade resource production buildings and warehouses at the same time—don’t just rush to upgrade production and neglect storage!
Priority 2: Shipbuilding & Repair-Related
Losing a battle isn’t that scary—what’s worst is being unable to repair ships or replenish resources after fighting! Those who can keep their fleets repaired, replenish resources in time, and deploy combat forces anytime will be the ones who survive till the end.
Priority 3: Research & Function Unlocking
A lot of functions work like "the earlier you unlock them, the faster you gain the advantage". The worst thing for new players is realizing in mid-game: "Oh! I should have unlocked this function way earlier!" Missing that is a huge loss.
C. Resource Gathering & Management
Think of resource management like running a factory:
-
Raw Material Side: Fully rely on gathering fleets to transport resources from mines back to base.
-
Production Line Side: Shipbuilding, base upgrades, and fleet maintenance all consume resources.
-
Inventory Side: Warehouse capacity is the maximum amount of resources you can store.
What you should do isn’t to frantically gather resources, but to make sure the gathered resources can be immediately converted into combat power.
So I recommend new players: -
Settle down first, stick to a few stable mineral gathering routes.
-
Then gradually move your gathering nodes to areas with richer resources.
IV. Fleet Formation & Configuration System
A. Ship Classification
Types & Core Roles
You can categorize all warships into 4 core roles:
-
Tank Role: Soaks damage at the front line, ensuring your backline doesn’t get wiped out instantly.
-
DPS Role: The core firepower responsible for taking down enemy units.
-
Support Role: Boosts your overall combat effectiveness, making each engagement more profitable in resources or strategic advantages.
-
Utility Role: Handles pre-combat preparations, directly determining if you can successfully pull off this fight.
If you only stack DPS units, once enemies use crowd control skills or focus fire, your DPS will get melted before they even fire back. On the flip side, if you only use tank ships, you won’t deal enough damage to kill anyone, and your logistics will collapse before you can wear them down.
B. Optimal Fleet Composition
I’ve put together 3 setups for powerful fleets that don’t rely on ultra-rare ships. Just fill in whatever you’re missing:
Setup 1: Resource Collection Escort Fleet
-
1x Resource Collection/Transport Fleet
-
1x Light Escort Fleet
Core Goal: Keep your resource collection lines active and rolling, so you can snowball early-game.
Setup 2: Small-Scale Combat Fleet
-
Front Line: At least one unit that can survive a full focus-fire volley
-
Back Line: Equipped with consistent DPS units
-
Support: Bring one if you have it, otherwise use a beefier front line instead
Core Goal: Even if you lose, losses are minimal; if you win, you’ll get combat merit or resource points.
Setup 3: Defensive Counter Fleet
-
Front Line: Extra-tanky units
-
Back Line: Focus on sustained combat and longevity
-
Preserve as much combat power as possible
Drag enemies into a prolonged war of attrition, and they’ll run out of supplies fast or even retreat on their own. The core goals here are clear: Hold strategic locations, keep resource mining nodes safe, and keep your alliance’s development on track.
-
Once the game hits the expansion phase, you’ll spot a common mistake: Sending all fleets from your main base is a terrible idea!
-
Too far → longer travel time → you’ll react half a beat slower than enemies
Overstretched supply lines → One mistake, and your entire defense line could collapse entirely
So mid-game, you must split Combat Fleets and Collection Fleets, and push Combat Fleets closer to frontline outposts. Recent official updates and previews also mentioned sub-bases give better resource storage and management in the galaxy—this is essentially telling you to expand logistics outward to boost frontline sustain.
V. Planning Circles & Territory Control
A. Basic Concepts of Planning Circles
A common newbie mistake: Thinking parking your fleet in an area counts as occupying it.
But the core logic of Infinite Lagrange is: You need to build a persistent presence in that zone to exert influence—hence the full system of Occupation, Control, Operations, and Outposts. The official also released a separate preview on “Occupation/Control” to explain this core galaxy expansion mechanic.
Here’s how I understand this mechanic:
-
Planning Circles = The main way you project resources, action points, and control into an area
-
The more logical your Planning Circles are, the more you’re “managing a galaxy” instead of mindlessly grabbing territory without a plan.
B. Territory Occupation & Control
You can split in-game territory into 3 tiers:
-
Pass-Through Type: Only stop briefly to mine or defeat neutral units, then leave
-
Temporary Control Type: Can hold territory for a while, but once enemies mass up forces, it’s hard to keep long-term
-
Long-Term Operational Type
These territories, which come with strongholds, supply lines, logistical support, and backup from allied factions, are like your second home base in a distant galaxy.
During the newbie phase, focus on reaching the goals from Stage 1 to Stage 2 first, then move up to Stage 2→3 in the mid-game. Don't rush to seize the core resource zones at the start—you won’t have a proper logistical system yet, so even if you get good territory, you can’t hold it.
C. Strategic Location Selection
When I pick a strategic location, I only care about three things:
-
Resource Density: How many mineral nodes are there, and is their quality stable enough for long-term mining?
-
Transport Nodes: Is it a key choke point that other players must pass through, and does it have high strategic value?
-
Defensibility: The terrain, how close it is to your alliance’s logistics lines, and whether you can get quick support to hold the stronghold.
If you’re a player who prefers a peaceful, resource-focused playstyle: Prioritize areas with high resource density and transport nodes that aren’t critical choke points.
If you’re a combat-focused player: Go for locations with key transport nodes and the ability to rally allies quickly.
If you’re an engineering team member leading your alliance’s logistical advances: Choose relay positions along your alliance’s attack lines.
VI. Combat & Tactics System
A. Basic Combat Mechanics
A lot of times when your fleet gets wiped immediately, it’s not because you’re bad at controlling units—it’s because you’re missing these key mechanics:
1) You think it’s 1v1 fleets, but it’s actually firepower structure vs. structure
Some fleets rely on burst damage to take out backline units instantly, some use sustain to wear down enemy power over time, others use crowd control to shut down your output. If you don’t understand your fleet’s “win condition” at all, you’ll naturally get crushed in fights.
2) You think you lost because of fleet power, but it’s actually supply and time
The enemy can keep repairing and replacing damaged ships. Even if you win a single battle, their logistics will wear you down until you run out of supplies. In space combat, the “exchange ratio” is key: how much enemy power you take down for how much of yours you lose.
3) You think retreating is shameful, but it’s actually a skill
If you time your retreat right, you can minimize losses, keep your valuable resources and fleets intact, and use them in the next battle.
B. Combat Setup & Strategy
Core Idea 1: First, learn to not get one-shot
Set up your frontline ships, defense, and formation properly to make sure you survive the enemy’s first big volley. If you can hold on, you have a chance to counterattack or retreat.
Core Idea 2: Your output needs to hit targets, not just have the highest stat numbers
A lot of new players only look at damage numbers, but if your output can’t reach the enemy, gets stunned, or pulled away, even the highest stat means nothing. Consistent damage is better than glass cannons for the newbie phase.
Core Idea 3: Before fighting, ask yourself: Is this worth it?
What’s your target? Is it a rare mineral node? A key stronghold? Are you going for combat points, or just mad at the enemy? If you get into a fight based on emotion, it’ll turn into a supply line war, and you’ll definitely lose out on resources later.
C. Advanced Combat Tips
1) Recon & Intelligence Gathering:
First, figure out the enemy fleet’s composition. Then you can decide if you need to adjust your fleet or call allies for backup.
2) Mastering Rally Timing:
Alliance battles go wrong when individual players charge in and get picked off one by one. The right move is to cluster all your fleets on the same front, so you can use overwhelming force at once and avoid being split and crushed.
3) Cut Off Supply Lines & Routes:
This game’s competition is harsh: Even if you can’t beat the enemy’s main fleet, it’s okay. As long as you cut their logistics supply routes, their ships will retreat and pull back because they don’t have enough resources.
VII. Ship Enhancement & Modification System
A. Ship Levels & Enhancement
You can’t max level and upgrade every single ship. You need to make a clear priority list.
My personal priority for main ships is:
-
Damage Core Ships
-
Frontline Defense Core
-
Repair Support Vessels
-
Universal Vessels
B. Weapon Modification & Loadout
When modifying weapons, focus on these key points:
-
Is your fleet's damage profile focused on burst damage or sustained damage?
-
Is your fleet missing frontline firepower, rearline penetration, or targeted damage that counters specific resistances?
-
Do your fleet's current accuracy, range, and survivability support the modified weapons to perform at their full potential?
Many new players waste resources on ships that look powerful individually, only to create gaps in their fleet’s structure and end up losing worse in battles.
C. Long-Term Upgrade Planning
Veteran players don’t blindly chase every new update—instead, they plan ahead by doing these things:
-
Maintain a consistent "universal fleet framework"
-
When new blueprints release, only replace one part of your fleet
-
Keep other parts intact so you always have a battle-ready fleet on hand
VIII. Resources & Premium Purchases
A. In-Game Currency System
Resources in this game are generally split into these categories:
-
Basic Resources: Used for building ships, upgrading facilities, and repairing equipment
-
Speed/Convenience Resources: Save game time and boost operational efficiency
-
Gacha Resources: Exchange for blueprints and new equipment options.
Your goal is to turn the time you save into higher resource collection efficiency, a wider operational control range, and faster reaction times in combat.
B. Premium Purchases & Bundles
The most direct benefits of paying in this game are:
-
Shorten the transition from early to mid-game
-
Help you build a reliable fleet more steadily
But paying doesn’t guarantee wins against players who actually know the game’s rhythm—war is a combined competition of alliance coordination, route planning, intelligence gathering, and resource supply.
C. F2P Player Progression
F2P players should do these three things:
-
Join an alliance with a stable operational rhythm and good coordination
-
Invest resources in areas that give consistent returns
-
Avoid pointless emotional fights as much as possible
IX. Finance & Weiyang System
The "Weiyang Finance" you mentioned—let’s break it down practically: no matter how the system’s name changes across versions, it’s essentially short-term investment for long-term gains.
A. Weiyang Finance Plan
There’s really only one core question here:
Is it worth losing a little resources/currency now to get more resources/currency every day in the future?
My evaluation method is simple:
-
Do you log in every day to claim all your earnings?
-
Are you in an expansion phase where you need to build strength quickly?
-
Will buying Weiyang Finance leave you short on resources for building ships right now?
If you’re the type who logs in daily to claim earnings, your alliance has a stable rhythm, and you’re in a fast expansion phase, these long-term gains will usually feel meaningful—like the official offerings, for example.
Before expanding your territory, make sure that location is worth investing your resources to station there.
B. Quest System Deep Dive
Think of the game’s quests as devs’ subtle way of telling you “Don’t mess around!” Many of these quests actually teach you:
- which buildings or facilities to upgrade first
- which features or tech to unlock first
- which resource production line to prioritize.
If you skip quests randomly, you’ll hit a critical unlock node later and end up going “Why am I short on every resource?!”
C. Long-Term Development Goals
- Personal Level: Stick to a stable core of 2-3 fleets first—no need to chase quantity at the start.
- Alliance Level: Work with your members to advance territory, control resource zones, and fight for strategic nodes—teamwork matters a lot here.
- Season Level: Adjust your playstyle based on each season’s rules. Don’t just copy last season’s strategy! Flexibility is key.
XI. Common Questions & Pro Tips
A. New Player FAQ
Q1: Should I keep moving my base to find better mining spots?
A: Definitely NOT early game! Finish mining all the stable, nearby ore nodes first, upgrade your infrastructure and escort fleets, then even think about distant ores. Distant nodes aren’t rewards—they’re a test of how well you handle pressure.
Q2: I got destroyed once and can’t bounce back—what do I do?
A: Switch immediately to a setup focused on mining and escorting. Stabilize your resource output and fleet repairs before rebuilding your combat power. If you rush to get revenge, you’ll just crash and burn again.
B. Base Development Issues
Q3: My building upgrade is stuck because I’m short on resources—what should I do?
A: First check if your warehouse is full. Then see if your mining fleets are idle. Only then think about switching mining spots—don’t move your base right away at the start.
C. Fleet & Combat Problems
Q4: I have higher combat power, why did I lose?
A: 90% of the time, it’s your fleet composition! Like no frontline tank ships to soak damage, no follow-up sustain, your damage can’t hit their core, or you got locked down by control skills. Combat power is just a total score—you need to check each part works!
Q5: When should I retreat?
A: When you realize “I’m spending way too much for tiny losses!” For example, if your main damage ships are down, repair ships go first, or your supply lines are cut. Keep fighting and you’ll only make the loss way bigger than needed.
D. Resources & Premium Tips
Q6: Can F2P players enjoy this game?
A: Absolutely! But rely on your alliance for help, follow the game’s pace, and skip meaningless rage battles. The worst mistake is wasting resources on fights that give no real gain.
XII. Version Updates & New Content
A. Game Version Updates
You don’t need to panic over every official announcement—just focus on 3 key points:
- Did they change mechanisms like “outpost control/expansion” that will affect your future development?
- Did they optimize efficiency systems for “sub-bases/logistics/storage” to save you more resources and time?
- Did they balance “ships/blueprints/weapons” in a way that changes your combat choices?
The official update page compiles all this regularly—just skim the key headlines when you have time, no need to read every single word.
B. New Content Intro
New content usually brings two types of impacts:
- New resources or combat efficiency points to help you progress faster
- New counter rules or tactics that require you to rethink your playstyle.
Don’t rush to try everything at once—adapt first before you dive in, don’t just force your old playstyle on new stuff.
- If you’re unsure about investing resources, hang around your alliance to see what top players are doing, then decide how to split your resources so you don’t waste them.
C. Events & Perks
The official events are basically designed to help you fill your “resource gaps”—but remember
The most valuable use for event resources is filling the gaps in your long-term plan. Don't splurge them as soon as you get them, no exceptions.
D. Community Feedback & Development
Community intel is actually super important for this game, especially these key bits you need to track:
-
The current hottest conflict hotspots in certain galaxies
-
The strongest fleet build ideas in the current patch
-
Diplomatic trends between alliances
You don't need to be the go-to intel person for the entire alliance, but at least know "what core resources are people fighting over right now".
If you stick with *Infinity Lagrange* into the late game, you'll realize it's not just your average space shooter—it's way more like running an interstellar space corporation. You need to set up stable production lines, build a smooth logistics network, prep solid defense, and maintain good ties with your allies. Then, you need to turn resources into combat power at the right moment, use that power to seize more territory, and let that new territory bring in more resources—creating a positive feedback loop. A lot of new players mess up because they rush to progress too fast. But in reality, the best players here are the ones who stick to a steady pace and don't go after small, quick wins.