Dragon Nest Classic Returns: The Ultimate Guide to Turn New Players into Pros
Dragon Nest: Classic Reborn is a game that brings fun to everyone, whether you’re a long-time veteran who mastered the original or a total newbie just starting out. This isn’t just a simple rehash of the old game—it delivers a whole new experience. Today, I’ll be breaking down the core mechanics, class-building tips, resource management tricks, operation optimization hacks, and community interaction strategies from a regular player’s perspective, to help you level up fast from a total noob to a seasoned pro on the magical continent of Athenaeum.
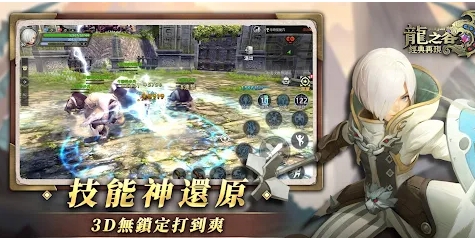
I. Core Game Mechanics Breakdown
A. Deep Dive into the Combat System
3D Non-Target Combat Skills and the Roll Dodge Mechanic
In Dragon Nest: Classic Reborn, combat uses a 3D non-targeting system—meaning you can move freely around the battlefield and react in real time to enemy movements. Roll and dodge are make-or-break skills here. Master these, and you’ll be able to weave around fights smoothly, handle any unexpected situation easily, and avoid getting hit most of the time.
Custom Skill Combo System (Hotkey Setup and Combo Chaining)
The game’s skill combo system is super flexible—you can set up hotkeys exactly how you like, and craft your own custom combos that fit your playstyle. This makes your damage output way smoother and more efficient, lets you stay in control during intense fights, and avoids missing out on damage because you pressed skills at the wrong time—so overall combat performance gets a big boost.
Dual View Switching Strategies (PC FPS View vs. Mobile Intuitive View)
The game supports two view modes, so whether you’re playing on PC or mobile, you can pick the one that feels best. The PC FPS view is great for precise aiming—perfect for targeting enemy weak points. The mobile intuitive view is built for touch controls; you won’t have to adjust much to get used to it, and it helps cut down on mistakes.
B. Dungeon and Nest Mechanics
Abyss Dungeon Stamina Allocation and Maximizing First-Clear Rewards
Abyss dungeons are the hardest challenges in the game, and you only have a limited amount of Stamina to use each day—so how you spend it matters a lot. My tip: prioritize dungeons with the best first-clear rewards first. That way, you’ll get the most out of your Stamina instead of wasting it on dungeons with lousy rewards and missing out on rare items.
Hellhound Nest Multi-Stage Boss Guide (Toxic Cloud / Full-Screen Lightning Strike)
The Hellhound Nest boss fight has multiple stages, each with its own attack pattern. For example, when the Toxic Cloud stage hits, move away fast to avoid the damage. During the full-screen lightning strike, you have to time it just right to dodge this deadly attack. Pro tip: communicate with your team, plan tactics, and call out positions so you don’t wipe the whole group.
Mist Nest Team Positioning and Class Composition Tips
Team positioning and class combos are key to winning at Mist Nest. Tanks are in charge of drawing enemy aggro so the rest of the team can safely deal damage. Damage dealers need to stay in safe spots and not pull extra mobs. Healers have to keep a close eye on everyone’s HP, use heal skills in time to save teammates, and keep the whole group alive.
II. Class Training and Skill Strategies
A. Build Guides for Popular Classes
Warrior Class: Typhoon AOE Build vs. Air Raid Single-Target Burst Gear
Warrior players have two main build paths to choose from. The first is the AOE build, perfect for clearing groups of mobs quickly and efficiently. The second is the single-target burst build, which hits really hard against bosses. Mix and match gear and skills for different situations, and you’ll get maximum damage out—so you’ll be ready for any dungeon or boss fight.
Priest Class: Holy Combo CC Chain and Healing Light Coverage Optimization
Priest players should focus on boosting their crowd control (CC) and healing abilities. Holy Combo is a great CC skill that locks enemies down, creating space for your team to deal damage. Healing Light is vital—this skill can save teammates’ lives in key moments, making you an essential support in group dungeons and keeping the whole team alive.
Archer Class: Stormburst Timing and Focused Shot Positioning
Archer players need to pay attention to when they use their skills. Stormburst works best when enemies are clustered together—it hits hard in a wide area and makes quick work of mob groups. For Focused Shot, pick a good position to make sure every arrow hits its target, get maximum damage, and don’t waste shots by missing.
B. Advanced Progression Systems
Rune Synthesis Strategies (Prioritize Attack-Type Upgrades)
Runes are a key way to boost your character’s stats. My tip: upgrade attack-type runes first. That way, you’ll quickly increase your damage output in the early game, setting you up well for later high
Laying a solid foundation by tackling challenges is key — later, you can upgrade other rune types based on your class needs.
Dragon Gem Acquisition & Attribute Selection for Inlaying
Dragon Gems are another great way to boost your character's stats. Pick the right attributes to inlay based on your class and needs, and you'll significantly improve your overall strength. For example, damage-dealing classes should prioritize attack-related attributes, while healers should focus on resistance or healing effects. Adjusting flexibly will give you the best results.
Gear Enhancement Protection Rune Timing (+7+ Anti-Degrade Tips)
Gear enhancement is a critical step to power up your character. Once your gear is enhanced to +7 or higher, it's recommended to use a Protection Rune — this prevents your gear from being downgraded if enhancement fails, saving you materials and time. This is especially important for high-tier gear, as all your hard work would be wasted otherwise.
III. Resource Management & Economy System
A. Stamina Allocation Strategy
Daily 500 Base Stamina + Limited-Time Bonus Allocation Plan
Your daily base stamina is 500, plus extra stamina from limited-time events. Planning how to use these is key! We recommend prioritizing dungeons with rich rewards during daily limited-time events — this maximizes stamina returns, no wasted stamina points, and makes your gameplay way more efficient.
Dungeon vs. Nest Dungeon: Value for CP Comparison
Both Normal Dungeons and Nest Dungeons have their own strengths. Normal Dungeons offer richer rewards but are more challenging, requiring great teamwork from your party. Nest Dungeons, on the other hand, test team synergy more, are more fun to play, and give unique rare items. You can choose the dungeon that fits your schedule and party situation — don't force yourself to play content that's too hard for you.
Pick the right dungeon for the job, and your quest or resource grind will go smoothly! Just choose the dungeon that matches your needs — no need to force yourself to take on overly challenging ones.
Gold-Capped Stamina Purchases: Cost Analysis of Incremental Costs
Extra stamina uses Gold to purchase, and the more times you buy, the higher the Gold cost per purchase. If you have enough Gold, buying a few times moderately will improve your dungeon farming efficiency, which is actually a cost-effective choice — don't waste precious stamina points!
B. Dragon Coins & Mall Resources
Monthly/Privilege Card 30% EXP Boost: Tested Benefits
Monthly or privilege cards give a direct 30% EXP boost, which is a huge help for leveling up! Especially if you buy one early in the game, you'll level up way faster than other players. Get your level up quickly to gain an edge, so your later development will go much smoother.
Level-Up Potion Use Timing & Transition Gear Matching
Level-Up Potions can quickly boost your character level, but you need to time them right — don't waste them! The best time to use one is after you've cleared all main quests in your current stage and equipped transition gear. Using it here maximizes its leveling effect, so you won't regret wasting this potion.
Arena Tokens: Priority Item List for Exchange
Don't waste Arena Tokens randomly! Prioritize exchanging for high-tier gear and enhancement materials — these are the most useful. They directly boost your character's combat power, way more helpful than flashy cosmetics or useless items. You need to learn to be budget-friendly when playing games!
IV. Technical Optimization & Cross-Platform Strategies
A. Mobile Gameplay Optimization
Custom Skill Bar Layout (Common Skills on Right Side)
When playing on mobile, customize your skill bar layout to fit you best! Put the skills you use most often on the right side — this makes tapping way easier, boosts your operation efficiency, and prevents you from messing up skills during dungeons or PvP (which would be a total fail).
Auto-Battle Trigger Conditions & AFK Earnings Formula
Auto-Battle is super convenient — you can earn rewards even when you're offline AFK. But you need to set the right trigger conditions, like when to turn Auto-Battle on and when to stop it, so you don't waste your AFK time and improve overall AFK efficiency.
Overheating Control & Battery Life Balance Plan
Playing on mobile for too long causes overheating and fast battery drain. When this happens, go to the game settings to lower graphics and effects, balancing performance and battery life. Otherwise, your device might shut down mid-game, which would be so frustrating — especially important for long AFK sessions.
V. Community Interaction & Version Updates
A. Limited-Time Event Participation Strategies
Double EXP Periods (12:00-14:00 / 20:00-22:00) Stacking Tips
The game has double EXP periods, like from 12 PM to 2 PM and 8 PM to 10 PM — don't waste these! Jump into limited-time events during these hours, and you'll get twice as much EXP as usual. This is the golden window for leveling up fast!
Wed/Sat Normal Dungeons: Double Dragon Essence Drops
Every Wednesday and Saturday, Normal Dungeons have double Dragon Essence drops — this is an amazing chance to farm resources for gear upgrades! Plan your time in advance, find a team with good synergy to run efficient dungeons, and make sure you grab all the resources.
Securing resources is what really counts.
Rare Title Acquisition & Auction Revenue Sharing for Guild Wars
Guild Wars come with tons of perks—they boost your guild’s reputation, let you earn rare titles, and even give you a cut of the auction rewards after victory! Stay active, work closely with teammates on tactics, and you’ll raise your win rate while scoring bigger gains.
B. Cross-Server Collaboration System
Non-Aggression Pact (NAP) Alliance Diplomacy Strategy
Signing a Non-Aggression Pact (NAP) with other guilds is super helpful—it cuts down on war losses and lets you pool resources for large cross-server events! Keeping up good diplomatic ties also means you can trade resources later and count on allies for defense when you’re in trouble.
Server Merge Prediction & Pre-Stockpiling Resources
The devs merge servers regularly, so if you can spot a merge ahead of time, you can plan your resource stockpiling and market plays way smarter! For example, buy up needed supplies at low prices before the merge, then resell them for a nice markup once it goes live.
World Boss Damage Contribution Calculation Model
In World Boss events, the damage you deal directly decides how good your rewards turn out! We suggest picking the right burst rotation for your class, coordinating with teammates to use defense-lowering or damage-boosting skills, and boosting your total contribution to get better loot.
Dragon Nest: Classic Reborn is more than a game for old players to relive their glory days—it’s an adventure that tests strategy and skill. Whether you’re a seasoned vet who’s been gone for ages or a new adventurer stepping onto the Altria continent for the first time, the detailed breakdown and tips here will help you play smoother and get stronger fast. Keep exploring, refine your adventuring skills, and who knows—you might be the next Dragon Nest legend!