Light & Shadow: Expedition 33 – Complete Guide (Team Comp / Build / Runes / Bosses & Dual Endings An
"Clair Obscur: Expedition 33" is one of the most addictive turn-based RPGs I’ve played in recent years—the kind that makes you want to play "just one more round" nonstop. On the surface, it looks like a typical turn-based game where you pick moves and let them play out, but the actual combat is way more complex. Players don’t just have to plan skills, AP, and character combos; when enemies attack, you also need to manually dodge, parry, counterattack, and even aim for weak points to deal real damage. Bosses’ combo attacks feel as intense as those in action games! Launched on April 24, 2025, this game is now available on PS5, Xbox Series X|S, and PC, plus a free "Thank You" update with tough challenges and extra content has been added later.
I. Clair Obscur: Expedition 33 Full Guide: Beginner’s Tips & Core Gameplay
A. What Is Clair Obscur: Expedition 33?
This turn-based RPG is developed by French studio Sandfall Interactive. Its biggest highlight is the dual mechanic of "turn-based strategy + real-time reaction"—you’ll have to think hard about skills, AP, and character builds, so it’s definitely not an idle game where you just select commands and walk away. When enemies attack, you need to manually dodge or parry too, balancing both brainpower and reaction speed.
B. Clair Obscur: Expedition 33 Lore & Story Background
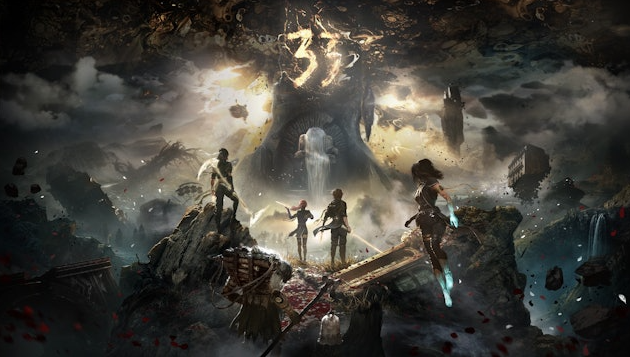
The City of Lumina faces a "Erasure" every year—caused by the Threadmother, who writes a new age number on the Stone of Fate. Residents who reach that age simply vanish. When the number hits 33, Gustav, Luene, Maelle, and others form "Expedition 33" to head deep into the continent, trying to find and destroy the Threadmother behind this disaster.
C. Turn-Based RPG, Real-Time Combat & Soulslike Elements
It’s not a standard Soulslike, but learning boss attack patterns, timing precise parries, pulling off perfect dodges, and retrying after death gives you that tense, "practice until you get it" feeling that defines Soulslikes. If you’re not great at real-time action inputs, don’t worry—dodge windows are way more lenient than parry windows. Newbies should prioritize surviving first, then work on mastering parries as you get more comfortable.
II. Clair Obscur: Expedition 33 Beginner’s Guide: Must-Know Early-Game Tips
A. Recommended Play Order For New Players
Stick to the main quest first to get familiar with Gustav, Luene, and Maelle’s basics, then tackle side quests along the way. When you first see colored enemies way higher level than you, don’t force a fight—mark their position and come back later to take them down, it’s way less time-consuming and won’t waste your effort.
B. Exploration, Camps, Flags & Resource Management
Expedition flags let you heal, restock consumables, and adjust skills/abilities—but regular enemies respawn after resting. Don’t just use camps for sleeping: mid-to-late game, boosting affinity with your party members unlocks extra skills, story scenes, and special rewards, so don’t sleep on this hidden perk.
C. Important Mechanics Newbies Often Miss
The most easy-to-overlook thing is Pictogram mastery. Equip Pictos and after 4 battles, their effects will turn into Lumina—used as a point to upgrade your characters. So when you get a new Pictogram, don’t just check the numbers; turn on useful passive effects to unlock their full potential.
D. Common Mistakes & How To Avoid Them
Don’t spread your stat points evenly across all attributes, and don’t just stack Strength alone. Each weapon has its own bonus rules—mid-game, pairing weapons with high-multiplier stats like Agility, Defense, or Luck is way more effective than just piling on Strength, so don’t waste points on meaningless attributes.
III. Clair Obscur: Expedition 33 Full Combat System Breakdown
A. Turn-Based & Real-Time Combat Mechanics
On your turn, you use skills via AP; when enemies attack, it enters real-time input phase. Successful dodges only avoid damage, but successful parries not only avoid damage but also build up counterattack chances. Mastering this will make fights way faster and cut down on unnecessary deaths.
B. Dodge, Parry & Counterattack Tips
When you fight a boss for the first time, I usually start with dodging to learn their attack rhythm; only then do I practice parries starting from the second fight. The scariest part of combo attacks is when you parry the first hit and let your guard down—many bosses’ deadliest moves are delayed on the last attack, so never get complacent.
C. Free Aim & Weak Point Attacks
Spend AP to enter Free Aim mode, where you can manually shoot enemies’ heads, cores, or glowing weak points. Some enemies will get staggered or change their moveset after breaking their weak points. If you’re stuck fighting a tough enemy that won’t go down easily, look for their shootable parts first—don’t just spam attacks blindly.
AP.
D. Break, Mark, Burn & Status Effects
Break staggers enemies; Mark makes the next targeted attack deal extra damage; Burn is perfect for skill combos with characters like Ma’er. Don’t mistake status effects for just extra damage—they’re actually the starting trigger for many high-damage builds, so make sure to make good use of these mechanics.
E. AP, Turn Order & Battle Rhythm Control
AP is more important than single-hit damage. Truly powerful late-game builds almost all revolve around the concept of “always having AP available”—like gaining AP from Guards, Crits, or at battle start. This lets your characters run their core skill cycle on the first turn, fully taking charge of the battle rhythm.
IV. Light & Shadow: Expedition 33 Character Recommendations & Roles
IV. Strength Analysis
A. Gustav’s Role & Playstyle
Gustav builds Overcharge by landing hits to boost his burst damage; the higher the charge, the harder his hits land. He’s very consistent in the early game with a low skill ceiling, making him perfect for your team’s Mark, Break, and single-target burst damage needs.
B. Lune’s Role & Elemental Skills
Lune uses elemental skills (Fire, Ice, Lightning, Earth, etc.) to create Stain states, then consumes different Stains to power up her subsequent skills. She balances healing and damage, and can flexibly adjust to your team’s needs—she’s one of the most versatile characters in the entire game.
C. Ma’er’s Role & Stance Mechanic
Ma’er has three stances: Defense, Attack, and Expert. The “Expert Stance” drastically increases her damage. With a well-built setup, she remains one of the most bursty single-target damage dealers in the late game.
D. Xier’s Role & Foretell Playstyle
Xier applies Foretell states on enemies, then uses those stacks to trigger burst damage. She needs a bit of setup time, but has insane Boss fight potential; she can also double as a support that provides AP and team Buffs.
E. Viss’s Role & Perfection Rank
Viss raises his Perfection Rank via attacks and Guards, but can drop ranks when hit by attacks. The better you learn enemy attack patterns, the more you can play to his strengths—higher ranks significantly boost both his damage and skill effects.
F. Monoco’s Role & Skill Features
Monoco can learn skills from enemies, and uses the Bestial Wheel to tweak his attack effects. He has a steeper learning curve when first joining your team, but becomes incredibly versatile once his skill pool is complete—he’s the kind of character that gets stronger the more you experiment with him.
V. Light & Shadow: Expedition 33 Strongest Teams & Lineup Recommendations
A. Early Game Newbie Team Setup
The basic Chapter 1 team is Gustav + Lune + Ma’er. Gustav handles consistent damage, Lune heals and outputs elemental damage, and Ma’er can unleash Burn and stance bursts—super well-rounded, easy for new players to use smoothly in the early stages.
B. Mid Game High-Flexibility Team Recommendation
For mid-game, I recommend the trio of Ma’er + Lune + Xier. Lune keeps the team’s HP up, Xier stacks Foretell and offers Buffs, and Ma’er finishes off foes—easy to use, no damage gaps, and has a high survival rate.
C. Late Game Max Damage Team Setup
If you want to push for extreme burst damage in the late game, go with Ma’er + Xier + Lune. Focus all damage boosts, Marks, AP, and status effects on Ma’er, letting her unleash a single devastating burst.
D. Boss Fight Single-Target Burst Lineup
The key for Boss fights is avoiding resource hoarding—assign one Main DPS, one Buff/Debuff support, and one AP or survival support. This setup stacks damage multipliers better than three pure damage dealers in actual play.
E. Mob Clearing & Exploration Efficiency Team
For regular exploration, I recommend Lune, Ma’er, and Viss. Use opening AP and area attacks to clear mobs first, no need for long cycles every battle—way more efficient.
VI. Light & Shadow: Expedition 33 Build Guide: Skill & Attribute Allocation
A. Vitality, Defense, Agility, Strength & Luck’s Functions
Vitality increases HP, Defense
Reduces damage taken, Agility boosts attack speed, Strength raises base attack power, and Luck affects critical hit chance. You gain Ability Points each time your character levels up, but mid-to-late game, you should prioritize distributing them based on your weapon’s Scaling (attribute synergy factor).
B. Early-Game Attribute Point Recommendations
For new players focused on damage-dealing roles early on, put points into Strength and Luck first. If you feel too squishy, dump a few points into Vitality until you can survive a Boss’s combo attack—your top priority here is dealing damage early.
C. Mid-to-Late Game Attribute Respec Strategy
Wait to respec your attributes until you get your core weapon. For example, after Mayleen gets the Medalum Crescent Sword, it’s way better to shift points into Agility and Defense instead of hoarding Strength like you did early on.
D. Damage, Speed, and Survival Builds
Damage-focused builds prioritize weapon scaling, critical hits, and damage boosts. Speed builds focus on stealing turns and AP regeneration. Survival builds rely on shields, healing, revives, and parry benefits. For your first playthrough, don’t force an all-out damage build—focus on completing the game reliably first.
E. Priority Skill Unlocks by Character
When spending Skill Points, prioritize unlocking skills that build your character’s core rotation—like Mayleen’s Stance Switch, Rune’s Stain Generation, Hiel’s Omen, and Voss’s Class Upgrades. Save raw-damage ultimate skills for later; they’re less efficient early on.
VII. Shadows of 33 Expedition: Weapon Guide & Best Weapons to Use
A. How Weapon Stats Tie Into Character Abilities
Weapons aren’t just about raw attack power—they unlock passive effects at specific levels. For your endgame setup, you need to check both the weapon’s Scaling and its bonuses at Lv.4, Lv.10, and Lv.20 to get the most out of it.
B. Mayleen’s Weapon & Crescent Sword Build
Mayleen’s core weapon is the Medalum Crescent Sword—you obtain it by winning the final match in the Arena of Spawn Village. Its key perk is letting her enter Master Stance much faster, so it’s super easy to miss but 100% worth grabbing early.
C. Best Weapons for Rune
Late-game, her strongest options are weapons that boost elemental damage and Stain effects—this amplifies both her damage and support skills. Just check the stat bonuses and skill synergies, and you’ll find her perfect endgame weapon.
When picking your team, prioritize Choralim—its skill kit pairs perfectly with Rune’s multi-hit skills and action rhythm. Unlocking it ties into camp side quests and hidden Boss trigger conditions, so keep an eye out.
D. Hiel & Voss Weapon Picks
For Hiel’s weapon, choose based on your playstyle—are you focusing on Omen burst damage, or team support? Late-game, the Charnon is a total powerhouse. For Voss, the key is mastering his Perfection Stance and skill rotation—don’t fixate solely on the sword with the highest raw stats.
E. Monoco Weapon Loadout
For Monoco’s weapons, pair them with the Bestial Wheel loadouts and skill types you use most often. After all, his biggest strength is his diverse skill pool—you don’t need to stick to one weapon the entire playthrough.
F. Late-Game Endgame Weapons & Upgrade Tips
Upgrading weapons requires materials like Chroma Catalyst, which gets super scarce late-game. Focus your resources on the top 3 weapons for your main team, don’t spread them evenly across all characters—you’ll waste materials otherwise.
VIII. Shadows of 33 Expedition: Pictos & Lumina System Guide
A. What’s the Difference Between Pictos & Lumina?
Pictos and Lumina are two very different systems. You can equip up to 3 Pictos at once—they provide passive effects and direct stat boosts to your character. Lumina only offers passive effects and requires Lumina Points to equip. Use both systems throughout your playthrough to maximize their benefits.
B. How to Unlock Pictos Lumina Effects
Unlocking Lumina effects for a Pictos is super easy—just equip the Pictos you want, and win 4 consecutive battles. It unlocks automatically after that. Once you get a good Pictos, level it up fast—hoarding it for only one character is a total waste of its potential.
C. How to Get & Allocate Lumina Points
There are plenty of ways to earn Lumina Points: you gain some when your character levels up, and you can pick up point-boosting items while exploring the map. If you run short on points...
Prioritize setting up AP cycles and core damage boost effects. For passives with low stats or weak effects, just leave them for later consideration.
D. Recommended Runes for Early Game
The early game can be pretty tough, so go for runes that boost starting AP, restore AP after blocking, revive on death, increase crit chance, or heal. These effects directly lower the margin for error for new players, so you don’t have to stress too much about messing up.
E. High-Damage Lumina Builds for Late Game
Late game is all about maxing damage, so stack First Strike, Glass Cannon-type damage boosts, crit, Mark damage, and all kinds of conditional multipliers. The end goal is to let your team’s main carry pull off a full damage combo in the first round and one-shot enemies.
F. Build Combinations for Survival, Crit, Speed, and AP
If you’re struggling against a boss, start with a survival build to get your footing. Once you’ve learned the boss’s attack patterns, switch to a Crit + AP + First Strike burst build. There’s no one “correct” build in this game—whatever works to take down the opponent you’re fighting is the right one for you.
IX. Strongest Builds & High-Damage Comps for Light & Shadow: Expedition 33
A. Ma’aeir Master Stance Burst Build
The core of Ma’aeir’s Master Stance Burst build is: get into Master Stance as fast as possible, then finish with high-multiplier skills like Stendhal and Sword Ballet. Even though Stendhal was nerfed by ~40% by the dev team, Ma’aeir still deals insane boss damage.
B. Lunet Element & Stain Build
Lunet’s Element & Stain build works like this: use low-cost skills to create various Stains, then use high-cost Element skills to consume those Stains for buffs. The best part of this build is that Lunet’s damage and healing skills share the same resource cycle, making it super smooth to play.
C. Cyr Foretell Burst Build
Cyr’s Foretell Burst build focuses on stacking Foretell charges first, then using all of them at once for massive damage. This build is perfect for high-health bosses because the longer the fight goes, the more Cyr can max out her damage multipliers—super useful for tough 1v1 battles.
D. Vysor Perfection Output Build
Vysor’s Perfection Output build’s biggest downside is that Vysor is super squishy, so this build tests how well you can time blocks. If you can keep maintaining the Perfection high-rank state, Vysor’s damage output is insanely smooth and strong.
E. Monoco Skill Cycle Build
Monoco’s Skill Cycle build requires planning your skill rotation around the position of the Bestial Wheel, so that each time the wheel spins, it strengthens your next skill. It’s kind of like solving a tiny battle puzzle—super fun to play.
F. Comparison: Crit, Burn, & Max Burst Builds
If you’re choosing between the three builds: Crit builds are the most versatile, working for most scenarios. Burn builds pair well with Ma’aeir and status effect combos. Max Burst builds need full gear sets, Lumina setups, and team buffs—they’re best for late-game fights against high-health end bosses like Simon.
X. Map Exploration & 100% Completion Guide for Light & Shadow: Expedition 33
A. World Map Exploration Order
Recommended exploration order: Focus on the main story for the first two chapters to unlock Esquie’s movement ability. Once you get flight in Chapter 3, you can fully clear the map areas—there are tons of places you can see but can’t reach at first that only open up when flight is unlocked.
B. Hidden Areas & Easy-to-Miss Locations
This game doesn’t have the usual RPG mini-map markers, so whenever you hit a fork, look for glowing items, ropes, or caves—always check them out! Especially in Chapter 3’s sky islands and map edge areas, there are usually the toughest hidden bosses and rare gear. Don’t sleep on these spots.
C. Paint Cages & Special Collectible Locations
If you run into a Paint Cage, first look for shootable lock points around it. You’ll usually need to use Free Aim to destroy several hidden switches in order to open the cage.
D. Lost Expedition Logs & Journal Collection
The Expedition Logs aren’t just achievement items—they have tons of info about past expeditions and the world’s secrets. If you want to dig deep into the game’s story, you need to collect all of them.
Want to fully understand the late-game story flow? The journals are NOT something you should skip!
E. Records, Costumes, & Cosmetic Collectibles
Records, outfits, and even hairstyles—these cosmetic items are mostly hidden within merchant transactions.
You can obtain these by clearing side quests, completing special affinity events, or beating challenge stages — plus, the official will keep adding new cosmetics later on!
F. Hidden Merchants & Special Rewards
That Gestral merchant will often ask you to win a duel first to unlock all his wares. When you see the duel option pop up next to him, don't chicken out — this fight is 100% worth it!
XI. Boss & Secret Boss Guides for Light & Shadow: Expedition 33
A. Main Story Boss Fight Tips
When fighting a main story boss, don't rush to spam attacks in Phase 1 — focus on watching their attack patterns first: Is their combo 3 hits, 5 hits, or do they have delayed follow-up attacks? Once you figure out these patterns, parrying in Phase 2 will be way easier (half the difficulty, basically!)
B. Boss Weaknesses & Parry Timing
When fighting a boss, enable Free Aim to spot their weak spots first, then adjust your strategy based on their elemental resistances. A pro tip: The hardest attacks to parry aren't the super fast ones — it's the delayed attacks that intentionally pause half a beat before hitting!
C. Guide to Boss "Hui Mu"
Before challenging the boss "Hui Mu", it's recommended to fully upgrade your core weapons for your main party, and prepare healing, revival, and Lumina materials for AP. Fighting Hui Mu isn't just about power-leveling to crush numbers — mastering the rhythm of skill usage is key!
D. Guide to Fighting Renoir
Renoir's fights are highly tied to the game's storyline, and his attack rhythm gets super fast in the late game. It's best to get into the habit of parrying when you see his weapon move, not just relying on your character's body movement (that's easy to mess up!)
E. Guide to Fighting Claire
Claire is a late-game, high-difficulty boss challenge — it's best to have a party that can remove or resist status effects to make this easier. Don't try to beat her in one turn on your first fight; focus on learning her attack patterns in each phase first!
F. Guide to Simon & the High-Difficulty Secret Boss
Simon is basically the final test for your entire Build setup! His HP, attack power, and combo damage are all insane, so it's recommended to beat the Infinite Tower and max out your late-game weapons before challenging him. After recent updates, players can still pull off high burst damage with characters like Maille, as long as you have a complete Lumina system and party damage boost cycle!
XII. Late-Game Progression & Leveling Guide for Light & Shadow: Expedition 33
A. Efficient Leveling & XP Farming Methods
In Chapter 3, don't rush to spam the same spot for hours — go clear the Colorful Enemies, Sky Island stages, and side bosses you can take down easily first. These enemies give way better XP and drop way more gear than regular mobs!
B. How to Get Weapon Upgrade Materials
High-tier Chroma Catalyst materials are mainly obtained from late-game areas, tough enemy challenges, or exploration rewards. When upgrading, prioritize the main carry's (main DPS) weapon first, then move on to support party weapons!
C. Lumina Points & Character Enhancement Resource Farming
Make sure to prioritize collecting materials like Lumina Points! The biggest bottleneck for building your Build in the late game isn't usually lacking a specific Lumina — it's not having enough points to equip everything you need at once!
D. Recommended Exploration Order for Chapter 3
My recommendation for Chapter 3 is to prioritize finishing the main story's final area first, then come back to clear Sky Island, Flying Manor, Infinite Tower, and high-difficulty bosses. If you level up too early, the main story bosses won't feel as tense!
E. Infinite Tower & Late-Game Challenge Content
The Infinite Tower has several rounds of battles that get progressively harder — it's also a great place to test different party and Build combinations. After the free update in late 2025, the game added Verso's Drafts, new bosses, and more late-game content!
F. Post-Max Level Character Enhancement Directions
Hitting max level is definitely not the end! The real limit breaks come from weapon levels, Lumina Points, Pictos, character affinity, and Build combinations. In the late game, "gear setup" matters way more than extra base stats!
XIII. Story Analysis & Character Relations for Light & Shadow: Expedition 33
A. The Truth of Lumine City, Hui Mu, and "Erasure"
In the late game, it's revealed that the entire world of Lumine City is actually a space inside a canvas created by the Desander family. Hui Mu's true identity is Irene — she stayed in the canvas because she couldn't bear the grief of losing her son in the real world!
Originally
Expedition teams thought their mission was to kill the "Painter Mother" to end the "Erasure" phenomenon, but in reality, every Expedition team just got caught up in the Desandre family's tug-of-war over control of the Canvas and their own inner grief.
C. Gustav & May Story Breakdown
Gustav's death isn't just a shocking plot twist for players—it's the game's most direct emotional punch centered on the theme of "loss". The development team decided early on that this character would leave, specifically to make players truly feel the sudden grief the character experiences.
D. The Relationships Between Verso, Renoir, and Alicia
In the real world, Verso is dead; but in the Canvas world, he remains. Renoir is his father, and May's true identity has a deep connection to his sister Alicia.
E. Secrets of the Desandre Family and the Canvas World
The Desandre family is the creator of this Canvas world, and their obsession with power is the root cause of all disasters in the world. This secret isn't fully uncovered until late in the game.
F. Themes of Life, Death, and Loss in the Game
The core of this story is never the cliché hero vs. villain plot—instead, it revolves around a family drowning in the pain of losing a child, with everyone "painting" in their own way to hold onto the loved one who's already gone.
In fact, what *Light & Shadow: Expedition 33* truly explores is how we view the boundary of memories after loss: there is only a very thin line between remembering someone and refusing to let go because you can't accept their absence.
XIV. *Light & Shadow: Expedition 33* Ending Breakdown and Final Choice
A. Conditions for the Final Plot Split
The final plot split is super straightforward—no need to grind for hidden points, no complicated prerequisites. Just pick your side between May and Verso, then complete the final 1v1 fight.
B. Full Breakdown of May's Route Ending
Choosing May means choosing to hold onto this Canvas—she will rebuild Lumina City, bringing Gustav and others back, making it look like a perfect happy ending. But Verso is forced to stay in a world he's already tired of and wants to leave, while May herself will gradually be consumed by the power of this Canvas.
C. Full Breakdown of Verso's Route Ending
Choosing Verso means accepting the fading of this Canvas—friends in the painting, the city, and the whole world will disappear with it. But in the real world, Alicia and the family can finally face the truth that Verso is truly gone.
D. Differences and Symbolism of the Two Endings
May's choice is "holding on", while Verso's is "letting go". The former seems to cling to happiness but chooses to escape reality; the latter accepts reality, yet must once again face the pain of losing someone important.
E. Which Is the True Ending of *Light & Shadow: Expedition 33*?
The game actually has no officially defined "true ending". Lead writer Jennifer Svedberg-Yen also clearly stated that she does not consider either ending the only canon one; both endings have their own hopes and corresponding costs, and the final answer is left for players to interpret on their own.
XV. *Light & Shadow: Expedition 33* New Game+, All Achievements, and Platinum Trophy Guide
A. New Game Plus (NG+) Carry Over Content
NG+ mode retains your character's level, skills, weapons, and their upgrades, as well as key progression elements like Pictos, Lumina, and outfits. Enemies have higher difficulty, and equipment drops can grow to higher levels—making it a very challenging experience.
B. NG+ High-Difficulty Play and Build Recommendations
NG+ is perfect for testing all kinds of extreme builds, since you can obtain full Lumina and weapons as early as the game's start. You can challenge mechanics like low-health limit burst, full parry AP cycles, and more—things that are almost impossible to achieve in your first playthrough.
C. Trophies & Achievements You'll Easily Miss
The trophies you're most likely to miss are usually Expedition logs, music disc collections, character relationship lines, unique enemies, and side bosses. Before going for the platinum, it's recommended to check every area first—it's way less work than re-running everything after starting NG+.
D. How to Get All Weapons, Runes, and Collectibles
Pay special attention to character-exclusive weapons at the Head Village Arena, goods from hidden merchants, the Flying Manor, and areas only accessible after unlocking flight in Chapter 3. As for May's Medalum, if you missed it in your first run, there is another chance to get it later—though it will be far more difficult.
E. Recommended Platinum Trophy Route
The smoothest platinum trophy route is recommended to: first clear the main story, &r
Completing both endings → sorting out all character relationship lines → fully exploring all areas in Chapter 3 → challenging the Infinite Tower and hidden bosses → gathering all missing logs and records → finally entering NG+ mode. This way, you can cover most of the content in your first playthrough without wasting time on repeats.
F. Worthwhile Challenges to Tackle After Beating the Game
Besides Simon, Flying Manor, and the Infinite Tower, the game later received free updates including Verso's Drafts, new bosses, weapons, and outfits. For players who love min-maxing builds, clearing the game is just the beginning of truly “playing with numbers” in Light & Shadow: Expedition 33.
What makes Light & Shadow: Expedition 33 most attractive is that it brings turn-based RPGs back to the core charm of “better skill = stronger characters”. You can lower difficulty with levels and builds, but once you fully master a boss's attack patterns, a precise block, a smooth AP cycle, or burst damage from a perfect stance, that sense of accomplishment is way better than just stacking numbers aimlessly.
New players shouldn't rush to follow those “hundred-million-damage build” guides online in their first playthrough. First, understand each character's unique mechanics: how Lunette stores dyes, how Maera switches stances, how Seer stacks omens, how Wiz maintains perfect ranks, and how Monoco adjusts the wheel. Once you unlock all weapons, Pictos, and Lumina in Chapter 3, it's not too late to start building high-damage teams—you'll find the coolest part of this game isn't that some character is “overpowered”, but the build freedom it gives players, which lets you make the entire combat system play out in totally unique styles.