Black Contract: The Most Complete Guide to Mercenary Shard Farming and Upgrade Investments
If you've been diving into mercenary shards in *Black Contract* lately, congrats—you’ve actually stumbled on the game’s deepest core mechanic here: what you need isn’t just more damage output, but a full mercenary system that amplifies your existing damage, fixes your survival gaps, and keeps your combat flow smooth.
As for mercenary shards? Simply put, they’re the key path to turning your mercenary from a “throwaway tool you summon casually” into a second core character you can’t live with, whether in dungeons or PvP battles.
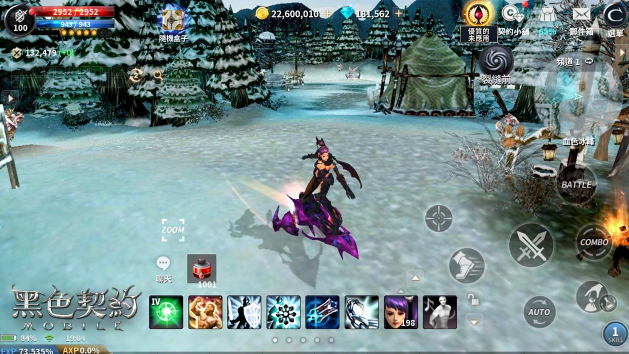
I. Introduction: Core Value of the Mercenary Shard System
A. Strategic Impact of Mercenaries on Dungeon Clearing and PvP Win Rates
Many new players starting out in *Black Contract* have this illusion at first: aren’t mercenaries just like regular pets? Summon them to deal a bit of damage, take small hits?
But once you hit the mid-game, you’ll notice: the impact of a mercenary on combat isn’t just “a little extra”—it directly changes the entire structure of your battle!
1) Impact on Dungeon Clearing: You’ll Suddenly Become Way More “Efficient”
What’s the most annoying part of dungeon clearing?
-
Too many tough mobs that trap you and won’t let you move
-
Your own skill rotation isn’t fully developed, so damage doesn’t line up
-
Slow mob clear speed → gets swarmed → health drops too fast → you get stuck immediately
What makes a great mercenary for dungeon clearing usually comes down to these key points:
-
Boosts your mob clear speed to a level where you’ll never get dragged down by mobs again, letting you breeze through dungeons
-
Even when your skills are on cooldown, you can rely on your mercenary for consistent damage or crowd control—no need to just stand there
-
Sometimes even grants extra damage buffs to make taking down mobs even faster
2) Impact on PvP Win Rates: It’s Not an Extra Ally—It’s an Entire “CC/Survival/Finisher” Toolkit
In PvP, the key to winning often isn’t about who has higher stats on their sheet—it’s about:
-
Can you disrupt the enemy’s combat rhythm first
-
Can you survive their first burst attack
-
Can you land the finishing blow at the right moment to seal the deal
If your mercenary is focused on CC, survival, or burst damage, that means in PvP, you’ve got a “critical skill button” you can tap at any time.
That’s why top-tier players don’t just compete on gear anymore—they compare how well they’ve invested in their mercs. Because that’s what actually decides wins.
B. Full Shard Progression Chain: Enhance → Ascend → Transcend Your Mercenary
You can think of mercenary shards as a super straightforward progression chain:
Shards → Enhance Level → Ascend at Max Level → Turn into a higher-star/higher-rank mercenary → Finally reach the “Transcendent Mercenary” form
The most important parts of this progression chain are:
-
Enhancement is the key to unlocking your merc’s current power—boosts their base combat strength
-
Ascension pushes your merc’s ceiling way higher, letting them unlock way more potential
-
As for Transcendence? It’s the sign that you’re making this merc your long-term core main.
So shards aren’t just random materials—they’re essentially your vote on whether you want to fully invest in a merc. The more shards you put in, the more that merc becomes a part of your character, and the smoother your teamwork gets.
C. 3 Common Mistakes New Players Make: Wasting Shards, Mis-Enhancing, Bad Ascension Timing
Now let’s talk about the 3 biggest pitfalls new players fall into. Avoid these mistakes, and your shard efficiency will at least double!
Mistake 1: Wasting Shards Randomly
So many new players have this “equal investment syndrome”:
-
When you get lots of Pact Shards → you max out Pact mercs nonstop
-
When you earn Trust from events
Fragments → just click any random mercenary fragment. Dungeons drop Mesmerize fragments → also use them on other mercenaries.
Final result:
You burned through all your fragments, but not a single mercenary has even reached Lv10 to ascend, and your combat power didn’t make any meaningful leap!
The correct solution is super simple:
Focus on leveling 1 to 2 mercenaries first, prioritize getting one of them to Lv10 before anything else—don’t spread your resources thin by jumping around randomly.
Mistake 2: Wrong Upgrade Order
You’ve probably noticed this: Pact fragments are plentiful and easy to get, but these mercenaries are mostly just for new players to transition through the early game.
The most common mistake new players make is: they level Pact mercenaries to very high ranks, only to hit a wall mid-game when they want to switch to stronger Mesmerize or Trust mercs—they realize they don’t even have enough fragments for ascension and get stuck dead.
Correct mindset:
Pact-series mercenaries are strong, but their power only needs to be enough to let you clear stages smoothly—never make them your permanent main carry team.
Mistake 3: Wrong Ascension Timing
Here’s another key point to highlight:
Before ascending a mercenary, you must first level them all the way to Lv10. And after ascending, they will reset directly to Lv1, so you need to invest resources to level them up again later.
So ascending is absolutely not "the earlier the better"—you need to confirm two things first:
-
You have enough fragments to level this mercenary back up from Lv1 to Lv10
-
You’re sure this mercenary is worth repeated resource investment
Otherwise, after ascending, you’ll enter a "weak adjustment period" where clearing stages becomes even harder—that would be super embarrassing!
II. Overview of The Four Mercenary Fragment Types
Next, I’ll break down the four types of fragments from real player use cases: including how easy they are to obtain, their investment value, and which stage of the game they’re best suited for.
A. Pact Mercenary Fragments: Free From Quests
Pact-series fragments can be seen as "new player exclusive bonus fragments". Their advantages are very straightforward: totally free, obtainable through game quests, and you can level them up very quickly in the early game.
Their disadvantages are also clear:
-
Their rarity is usually not in the top tier of this game.
-
Mid and late game, you will definitely want to switch to Mesmerize or Trust series mercenaries. So the positioning of Pact fragments is very clear:
They’re just supporting characters to help new players get through the early game and speed up stage clearing in the initial phase.
For example:
-
Skae’s combat mode increases attack power by 20%, which is extremely practical when clearing stages, as it directly boosts enemy-killing efficiency and saves time;
-
And the Fallen Swordsman is an AoE clearing god-level choice, giving a great sense of satisfaction when clearing stages. Especially before you master good multi-target skills, he’s literally a lifesaver for new players.
B. Trust Mercenary Fragments: Event-Exclusive Trade-In
For many players, Trust-series fragments are "dream-tier fragments". The reason is simple: they’re rare, mostly only obtainable from limited-time events or in-game shop exchanges, and the returns from investing in them are usually quite substantial.
But because of their rarity, they’re the easiest to make mistakes with:
-
You might rush to level them with just a small number of fragments, only to hit a wall at Lv4 or Lv5 and then be unable to obtain more fragments stably afterward.
The correct way to play with Trust fragments is:
Treat them as long-term planning assets, never as temporary toys to get quick gratification in the short term.
C. Mesmerize Mercenary Fragments: Consistent Dungeon Drops
Mesmerize-series fragments are the route I most recommend F2P players prioritize, because their core trait is:
Stable and reliable.
They might not be the rarest or flashiest type in the game, but their strength is that you can farm them every day, accumulate them steadily, and go at your own pace. For F2P players, the most frightening thing isn’t slow growth—it’s resource gaps that are completely uncontrollable. The best part about Mesmerize fragments is:
-
You can farm B1F to B3F of the Tower of the Dead daily.
-
You can confirm that you can get at least a few fragments every day. Over time, you can level a mercenary to Lv10, ascend them, then level them back to Lv10. This kind of "step-by-step, planned growth" is what...
- It's the most essential growth method for casual players.
D. Transcendent Mercenary Shards: Ascension & Synthesis Costs
As for the Transcendent-type shards, think of them this way: they are the required "gatekeeping materials" you must clear to bring a mercenary to their final form.
In essence, these aren't for mindless powering up—they're for breaking level barriers. So when you see the costs linked to Transcendent shards, be mentally prepared for this:
-
This is a long-term plan—no rushing it
-
This is proof you're treating a specific mercenary as your permanent main carry
-
This is also a key test of whether your resource allocation is smart
III. Shard Acquisition Efficiency Roadmap
Now for the most practical part of this entire guide: Where should you farm daily, what's your priority, and how to max out your resource acquisition efficiency?
A. Tower of the Dead: B1F to B3F
If you can only focus on one daily activity, it has to be: You must farm Tower of the Dead B1F to B3F every single day. The reason is simple:
-
Illusion Shards are the mainstay of daily growth
-
The Tower of the Dead is your
Let's start with reliable shard accumulation: The earlier you build a consistent habit of farming or stockpiling shards, the faster you'll enter the "stable shard growth phase."
Pro Player Tip:
-
Never skip shard-related tasks just because you're busy today—missing one day means missing out on that day's stockpile
-
One day of missed progress will slow your future ascension speed by a lot
-
Falling behind will also hurt your later map-clearing and PvP experience
This game is that realistic: A tiny daily gap turns into a huge difference after two weeks!
B. Bloodpeak Event Dungeon
Next up: Event dungeons like Bloodpeak—these are your "resource burst windows." The key isn't to grind until your stamina is gone every day; it's to do this:
-
Treat the event period as a golden resource boost window
-
Your usual daily farming will double in value with event bonuses!
So when you run dungeons like Bloodpeak, here's my advice:
Prioritize your stamina and time on activities where event bonuses will multiply your gains.
If the dungeon has multi-drop mechanics? That's even better—one run is worth two regular runs, so don't miss this chance.
C. Covenant Shop Exchanges
Next up: Covenant Shop exchange tips—what trust shards hate most is an inconsistent source, and the Covenant Shop is perfect for stabilizing your shard supply. But it's also easy to overspend here: you'll see tons of items you want to buy, only to end up short on trust shards when you need them.
My advice is straightforward:
-
Shop exchange priority list: Start with trust shards first
-
Next, buy key materials for ascension
-
Only then consider other drop-rate items or lifestyle goods
D. Mystery Chest Events
Next are Mystery Chest events—these are classic "luck-based" activities! They're not worth opening every day; only interact with them when these two scenarios happen:
-
When event bonuses apply
-
Or when you have extra resources saved up
Skip otherwise—you'll just end up opening a ton of chests full of useless stuff, still missing the shards you actually need.
IV. Level-Based Ascension Cost Comparison Table
The numbers in this "Level-Based Ascension Cost Comparison Table" are super important—they'll directly shape your future resource investment strategy!
A. Oath Shards: Total 3530 Shards for Lv1-10
Oath Shards sound like a big number, but 3530 total is actually a huge cost. This means one thing:
The Oath system won't fill up by casual clicking—it will also drain a lot of your time and shard resources. So how should you allocate your Oath Shards?
-
Newbie stage: Only level them up enough to make map-clearing feel smooth
-
Mid-game: Just open
Only allocate resources to Enchantment or Trust shards
-
Don’t treat Oath as the end-all-be-all, unless you truly love this mercenary.
B. Trust Shards: Total 2,330 Shards from Lv1 to Lv10
Trust Shards are cheaper per piece, but rarer. What does this mean?
Think of it as a “high-efficiency investment” — but only if you have a reliable source to farm these shards consistently. If your shard supply is unstable, you’ll likely get stuck mid-way and end up with a half-baked mercenary that’s not as good as it could be.
C. Enchantment Shards: Total 1,720 Shards from Lv1 to Lv10
Enchantment Shards total 1,720 pieces — the lowest total cost among the three shard types, and their sources are super consistent. That’s why I always stress this point:
F2P players should definitely prioritize leveling up Enchantment mercenaries as your main force. Getting the most stable improvements at the lowest cost is how you farm resources steadily for the long run, yeah!
D. Ascension Costs: Training Stones: 10 →50 →200 →800
This part is CRUCIAL — when ascending mercenaries, it’s rarely the shards that hold you back. It’s the Training Stone cost that jumps exponentially! The curve from 10 to 50, 200, then 800 means exactly this:
-
You’ll probably think the early ascension costs are fine
-
But later on, you’ll suddenly go “WHY does this cost so much?!”
So in the mid-to-late game, you need to plan ahead for your Training Stone sources. Even if you have all the shards ready, getting stuck on Stones and not being able to ascend is the most painful pain point ever!
V. Mercenary Recommendations for PVE/PVP
For this last section, I’ll explain “why this merc is fun to bring” — to avoid that useless list of names with no practical value.
PVE Map-Clearing Gods
1) Skai’d
Skai’d’s value for map clearing is super straightforward:
Bringing him on the field will drastically speed up your clear time. After all, the worst thing about map clearing is wasting time — the longer you take, the more monsters will swarm you, and your efficiency will plummet. Full-on damage is key here! The 20% Attack Buff means you won’t have to waste too much time in dangerous areas. Actual play experience:
-
Early game: You’ll notice maps clearing way smoother than before
-
Mid game: Material farming speeds up drastically, and looting resources feels way better
-
Late game: This isn’t your only option, but it’s super reliable — still a great helper for map clearing
2) Fallen Swordsman
If your team lacks AOE damage, the Fallen Swordsman will give you that “cutting through grass” feeling — so satisfying!
Its best scenarios to shine:
-
Areas with extremely high monster density
-
When you need to clear waves fast to keep your rhythm
Its downside: Against single-target bosses, its damage output might not beat dedicated single-target mercs. But for most players who prioritize map-clearing smoothness, having an easy time clearing waves is the top priority.
3) Ice-Flame Swordsman
Ice-Flame Swordsman is an absolute godsend for boss fights.
Just because you can clear maps doesn’t mean you’ll breeze through bosses — after all, bosses test two key things:
-
Is your single-target damage enough?
-
Can you keep dealing damage under boss skill pressure? Ice-Flame Swordsman’s value is filling that boss damage gap, so you won’t get stuck on key stages stressing too long.
PVP Control Mercenaries
The key to winning PVP isn’t dealing more damage than the enemy — it’s making them unable to do anything.
That’s why control mercs’ core functions are these:
-
Stun
-
Slow
-
Interrupt Bring the right controls, and the enemy will get so annoyed they can’t use their full power.
1) Control Mercenaries
Core Uses:
-
Interrupt the enemy’s burst damage windows
-
Force the enemy to use their survival skills
-
Create the perfect opening for you to secure kills
2) Survival Mercenaries
Core Uses:
-
Survive the enemy’s first burst attack wave
-
Don't let yourself get one-shot. In most PVP matches, surviving the first big burst is half the battle.
3) Burst Damage Mercenaries
Core Purpose:
-
To secure kills.
-
To take down enemies in one go.
But burst mercs rely a lot on your play rhythm—if your crowd control or survival skills aren't on point, no amount of damage will save you.
VI. Summon Orb Usage Guide
A lot of players overlook this, but using Orbs the right way can make your daily runs way smoother.
A. Summoning Requirements: Orb in your inventory + Inside a dungeon + Party size <5
The key here is the party size being under 5.
New players often run into this: they have an Orb in their bag but can't summon it when they're in a dungeon.
Always check your party size first—don't waste time for nothing!
B. Duration: 15-minute Cooldown CD
This means you can't summon non-stop. Treat summoning mercenaries like a strategic resource for key moments:
-
Right before fighting a Boss
-
When you're pushing for high-efficiency runs
-
Or when you're grinding Tower of the Dead for maximum loot today
C. Orb Price: 25,000 Alz each from the General Goods Merchant
25k Alz might not sound like much, but buying a lot daily adds up over time. So think of this as an investment:
Is the efficiency you get from this Orb worth 25,000 Alz?
It's usually a good call for high-yield dungeons, but not so much if you're just doing low-effort casual runs.
D. Daily Carry Recommendation: 3-5 Orbs
I totally agree with this range.
-
3: Your daily base, perfect for casual players
-
5: If you wanna grind for efficiency or finish all activity tasks today
Never buy 10 and let them go to waste—that's a total resource loss.
VII. Contract Shop Exchange Priority
You must remember this part! The Contract Shop is casual players' shot to catch up—but also the biggest pitfall for wasting points.
Top 3 Must-Buys
1) Trusted Mercenary Shards
If you wanna build Trusted mercenaries, this is your most reliable source. Swap this first—only then can you think about long-term high-rarity investments.
2) Xiu
Refinement Ore
The upgrade curve is 10→50→200→800—this will test your patience! If you don't stock up early, you'll hit that super annoying wall where you have enough Shards but can't upgrade.
Summon Orbs
Orbs are small helpers that boost daily efficiency—get the wrong ones, you won't rage-quit, but get the right ones, and your gameplay will be way smoother and more fun.
Drop Rate Items
Blessing Orb - Chest Drop Rate 00%
Blessing Orb - Mob Drop Rate 00%
Use these two based on your situation:
-
During events or for high-value dungeons → totally worth buying
-
Just casual low-effort runs → not worth it
The big takeaway: These are amplifiers, not foundations.
If your core setup isn't solid, don't waste resources on amplifiers yet.
Event Mystery Box Profit Analysis
The drop list you mentioned is classic: Shards + Ari combo, Skill Augment Books, Critical Chance Imbuing Books…all super tempting. For Mystery Boxes, here's my simple rule to judge if it's worth opening:
Are you someone who needs a key resource, or someone who wants to take a gamble?
Mystery Box Drop List
-
Mercenary Shards: Useful, but no guarantee you'll get the exact one you need
-
Skill Augment Books: Super valuable, but make sure your skill set actually needs it first
-
Critical Chance Imbuing Books: For players chasing PVP burst or max damage, but not for…
-
Who could use these...
So Mystery Boxes work best for: -
You’ve already nailed down your daily fragment farming route
-
You want to use extra resources to gamble for a big power spike in levels or abilities
-
Not suitable for:
-
You’re still a new player who doesn’t even have enough fragments to reach Lv10
Opening boxes here will likely leave you thinking “meh, that felt good for a second but didn’t actually move the needle.”
Top-Up Rewards
This kind of reward is basically a gacha design, but I’m only sharing strategies here—no pressure to spend real money:
-
If you’ve decided to invest, prioritize rewards that directly push your core mercenary to completion—those are the only ones worth it
-
Like getting 100 Skaii Fragments straight-up, that’s at least “resources you can use immediately”
-
For gear, orbs, or that kind of stuff—you need to make sure you’ll actually use them, otherwise it’s just a nicely-packaged waste of resources.
Strategy By Spending Tier
The three spending tiers you mentioned are already clear, so I’ve adjusted them to be more like a “daily to-do” play guide.
F2P Players: Specialize in 1-2 PvE Mercenaries → Aim for 3 Stars
The biggest fear for F2P players is “wanting everything.”
You need to build clear stage-clearing efficiency first, because that efficiency translates to better material gains—and more stable fragment income.
F2P Player Recommendations:
-
Pick 1 main merc for pushing stages first
-
Then pick 1 “tool merc” for Bosses or PvP
-
First goal is 3 stars
Never even think about maxing all mercs to 4 stars at the start—that’ll just burn you out fast.
Monthly Pass Players: Dual-Track PvE/PvP → 2 Main Mercs Each → Aim for 4 Stars
Monthly Pass players have the advantage: more stable fragments and resources, so you can start dual-tracking earlier.
Recommended Route:
-
Two PvE mercs: one for clearing mobs, one for Bosses
-
Two PvP mercs: one for crowd control, one for survival or burst damage
But be careful: dual-tracking doesn’t mean leveling all four mercs evenly.
You need to get one merc to the point where they’re a game-changer before you start working on the next one.
Whale Players: All Mercs to 4 Stars → Clear All Scenarios
Whales can finish all operations quickly, but there’s still one truth:
Even whales fear wasting their investments.
Even if you have unlimited resources, your time and skill are still limited.
The most effective strategy for whales is:
-
Max out core PvP roles first, because that’s where high-end matches are decided
-
Then max out PvE efficiency so you can farm resources way faster
-
Last are collection or fan-favorite mercenaries
New Player FAQ
Q1: Are Covenant Fragments worth upgrading?
A: Only use them as a temporary fix. New players can use them, but mid-tier players should switch to Enchantment series fragments.
Here’s a real player’s take:
Stop upgrading Covenant Fragments once you’re no longer stuck on stages. Save the rest for Enchantment or Trust fragments, and you’ll keep progressing smoothly.
Q2: Do I have to max Lv10 before ascending?
A: Yes, you do. When you ascend, Lv1 is reset and you have to re-upgrade.
So before ascending, make sure you have enough resources to go from Lv1 to Lv10—otherwise you’ll regret it super hard when your merc gets weaker after ascending!
Q3: What if I don’t have enough fragments?
A: Prioritize B1F of the Tower of the Dead, then the Contract Shop.
This is the “stable income + stable exchange” combo—you won’t be scrambling for a reliable source anymore!
Q4: Which fragments can be traded?
A: Only limited-time event fragments. All others are bound.
Player strategy: Use tradeable fragments wisely—you can even sell them for resources without losing out. For bound fragments, just hold onto them for the merc you actually want to main. Don’t waste them on random characters you’ll never use.
XI. Mercenary Power-Up Stat Comparison
The stat boosts you put together are super important because they clearly show: Ascending/starring up is a big power spike, not just a small buff.
-
1-Star Mercenary: Base Power +35%
-
2-Star Mercenary: Base Power +58%
-
3-Star Mercenary: Base Power +78%
-
4-Star Mercenary: Base Power +92%
Key Player Takeaways:
-
From 1-Star to 2-Star: A clear power jump
-
2-Star to 3-Star: The threshold to become a viable main carry
-
3-Star to 4-Star: The core gap between top players and F2P users
So the most rational strategy for F2P players: Push 1-2 Mercenaries to 3-Star first. Way better than keeping 5 Mercenaries stuck at 2-Star!
XII. Long-Term Shard Accumulation Plan
Monthly Accumulation Goals
-
F2P: 1200 Enchant Shards → 2 3-Star Mercenaries
-
Monthly Pass: 3500 Mixed Shards → 3 4-Star Mercenaries
-
Whale: Unlimited Shards → Full 4-Star Team
Player’s Breakdown:
-
F2P: Focus on consistency. Never skip the Tower of the Dead daily—this is your most basic and reliable shard source.
-
Monthly Pass: Focus on efficiency. Grab all available boosts during events—don’t waste this valuable chance.
-
Whale: Focus on choice. Invest in the most useful resources first before collecting—don’t throw money around randomly.
XIII. Update Drop Adjustment Predictions
The listed update directions: +5% drops in Tower of the Dead, new Mercenary Shards added to drop pools, refinement stone price adjustments, new pity system for mystery boxes. From a player’s perspective, if these changes go live, how should you prepare in advance?
-
Tower of the Dead +5% Drops
→ Enchant-focused paths will become way more attractive. F2P players should make daily Tower of the Dead runs a non-negotiable routine—never skip! -
New Mercenary Shards Added to Drop Pools
→ Larger drop pools mean shards get diluted, making it harder to farm specific ones. Rely more on shop exchanges or event-specific sources. Player strategy: When drop pools get bigger, "controllable fixed sources" become super important. -
Refinement Stone Price Adjustment
→ This will lower ascension thresholds. More players will start ascending mid-game, making PVP way more competitive. Player strategy: Once refinement stones become easier to get, prepare for shards and enhancement materials early. Otherwise, when everyone’s ascending, if you’re still stuck at Lv7, you’ll get crushed! -
Mystery Box Pity System Added
→ This turns mystery boxes from "pure luck gambling" into "planned investment"—their value goes up. But the rule still stands: stick to your daily routine first, don’t get greedy with luck-based pulls.
XIV. Common Shard Waste Traps
Three Big Waste Behaviors
1) Over-upgrading Low-Rank Pact Shards
If you use low-rank Pact units as your main team forever, you’ll regret it later. You’ll find that Enchant or Trust units have way higher upper limits and are way stronger—but by then you’ve wasted all your shards early on, leaving you unable to build meta units.
2) Mixing PVE/PVP Units Without Distinction
The AoE Mercenary you use for PVE map clears won’t work well in PVP; vice versa, a PVP-focused control Mercenary might lack damage/survival for PVE and get you stuck. Never mix these up and waste shards. A control Mercenary built for PVP is not always good for PVE maps. The worst? You dump precious shards into a Mercenary with average stats, ending up stuck on both PVE and PVP progress.
3) Not Prioritizing Event-Exclusive Shards
Event-exclusive Mercenary shards are rare. If you use or exchange them randomly right when you get them, you’ll probably never get them again once the event ends. Many players suggest: Don’t use event shards hastily. Wait until you decide which Mercenary to build, then invest—don’t impulse waste.
XV. Conclusion: Maximize Shard Investment Principles
Three Core Principles
1) Specialize Early, Dual-Focus Mid-Game, All-Rounder Late-Game
-
Early-Game: Focus on building one main Mercenary for PVE map clears first, maxing out your clearing efficiency
-
Mid-game: Gradually train "utility mercenaries" tailored for PVP scenarios
-
Late-game: When you have enough resources, consider developing all-round mercenaries that work in all situations
2. Prioritize Enchantment Shards, Opt for Trust Shards Second
For casual players, picking shards with the Enchantment attribute is the safest move. Trust attribute shards are better suited for players who plan to play long-term and build them up gradually.
3. Clarify PVE/PVP Roles to Avoid Wasting Resources
Before spending shards every time, ask yourself:
Is this mercenary for helping me push stages and clear maps? Or for PVP matches? Or is it only for Boss challenges?
Once you’re clear on their role, you won’t waste resources on irrelevant things.
The mercenary shard system in *Black Contract* might look like a "do a little each day, accumulate slowly" mechanic on the surface, but it’s actually the part of progression that needs the most long-term strategy:
If you collect just a few more shards daily and don’t waste any, you’ll be shocked in two weeks how much smoother stage progression gets and how much more confident you’ll feel in PVP fights.
That’s the trick with shard investing—it won’t turn you into a god-tier player overnight, but it will help you get more familiar with the game and improve your gameplay every single day compared to before.